
Unaric Voice
The Tenant Setup requires the values configured in the Azure Portal and Teams Admin Center.
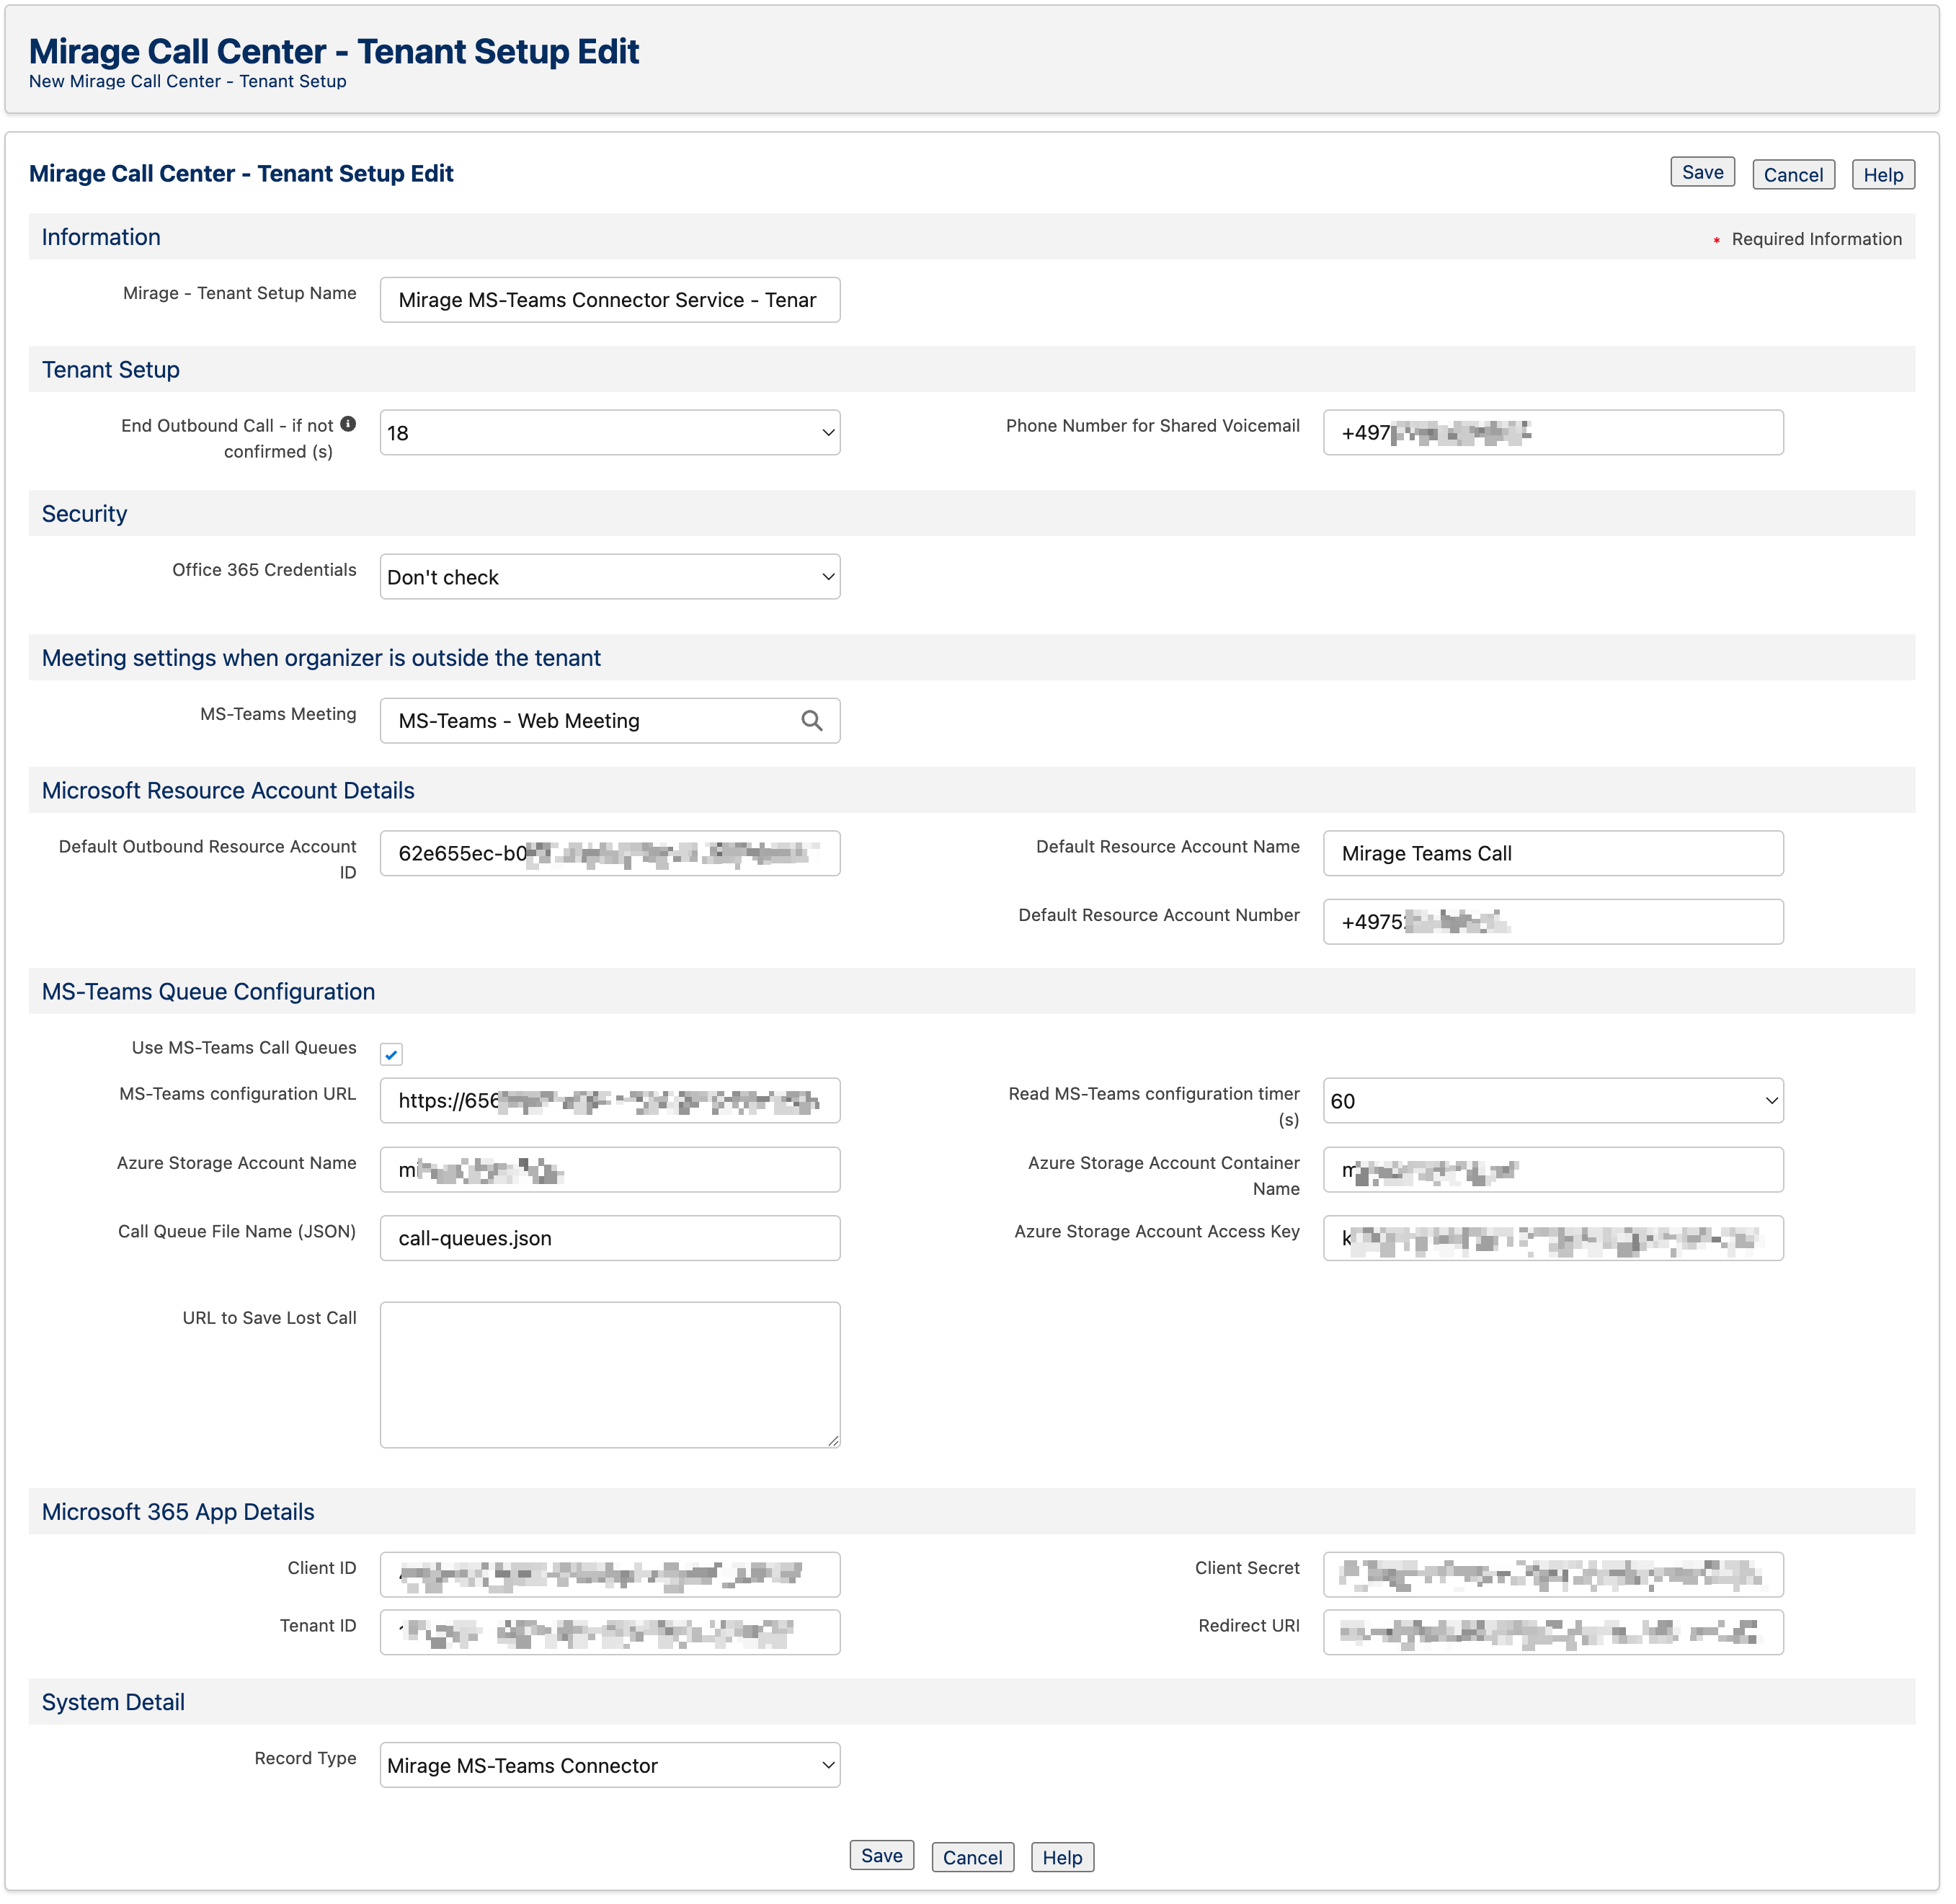
Phone System Setup
End Outbound Call - if not confirmed (s)
In case of an outbound call call: If a user does not click on the call icon in the Microsoft Teams App to start the call, the outbound call will be terminated after around the seconds specified here. The best value is 18s.
Phone Number for Shared Voicemail
The phone number which was configured for the voicemail of a group in Microsoft Teams.
Go To Teams Admin Center - Voice - Resource Accounts
where you find the configured Shared Voicemail.
Security - Office 365 Credentials
Office 365 Email Address - This is the email address associated with the user’s Office 365 account.
It is used to identify and authenticate the user in Salesforce for the Microsoft Teams integration, ensuring the connection between the two platforms works properly.
The feature offers three options:
Don't check - Uses your Salesforce email or a manually entered email without authentication.
Check on each login - Requires the user to authenticate their Office 365 email each time they log in to Salesforce.
Check once - Prompts the user to log in to their Office 365 email for one-time authentication.
Requires the following Authentication config in your Azure Bot.
MS-Teams Meeting - Exclude Meeting
Exclude meetings from being saved if they contain any of the following categories, separated by commas.
Note: If your organisation uses categories in multiple languages, you must list each language version separately.
Meeting settings when organizer is outside the tenant
Select Meeting settings when organizer is outside the tenant.
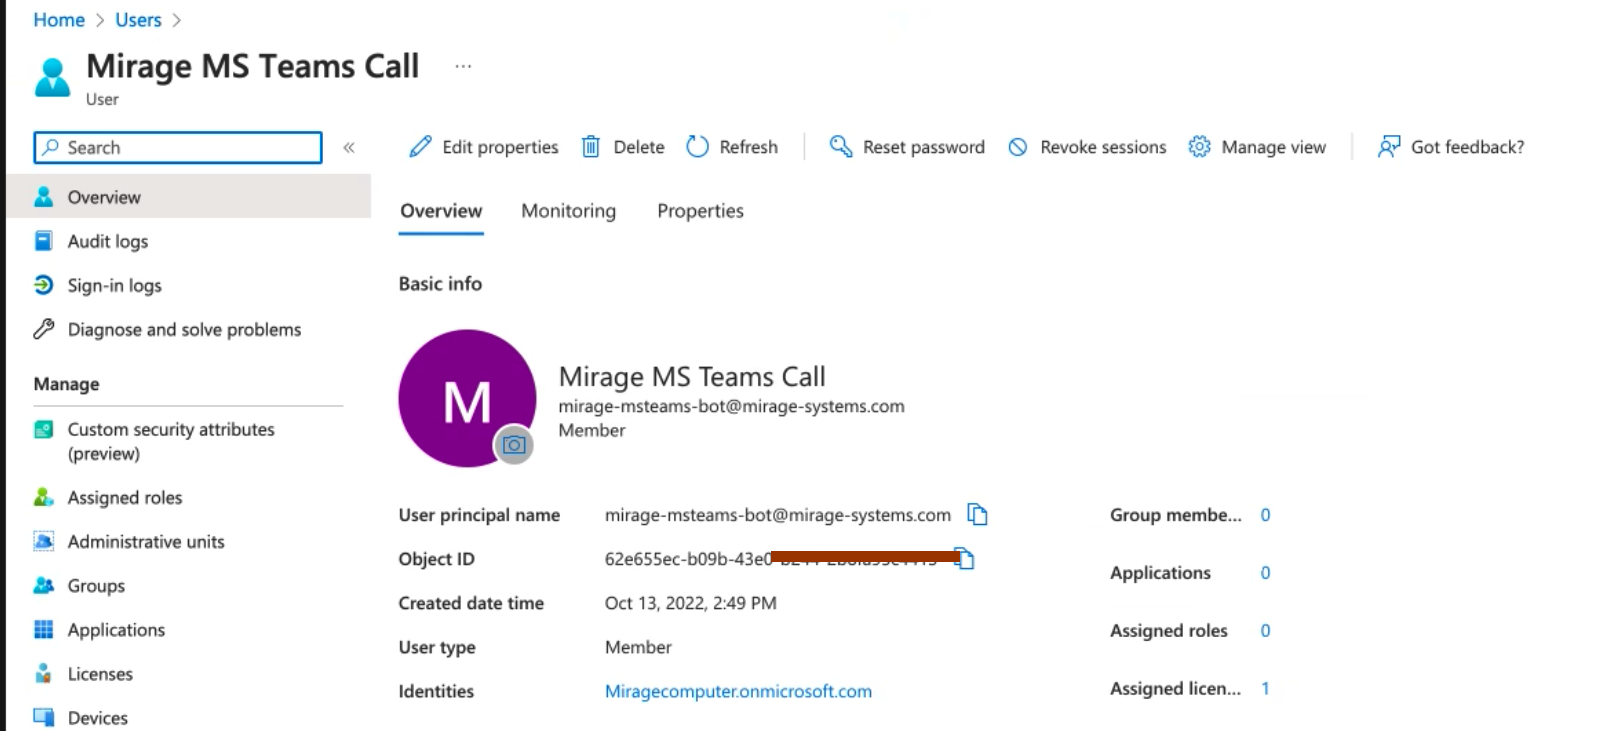
Default Outbound Resource Account ID
The Object ID configured in Azure.
In Azure go to Home - users and select the display name from the resource account - e.g. Mirage MS Teams Call
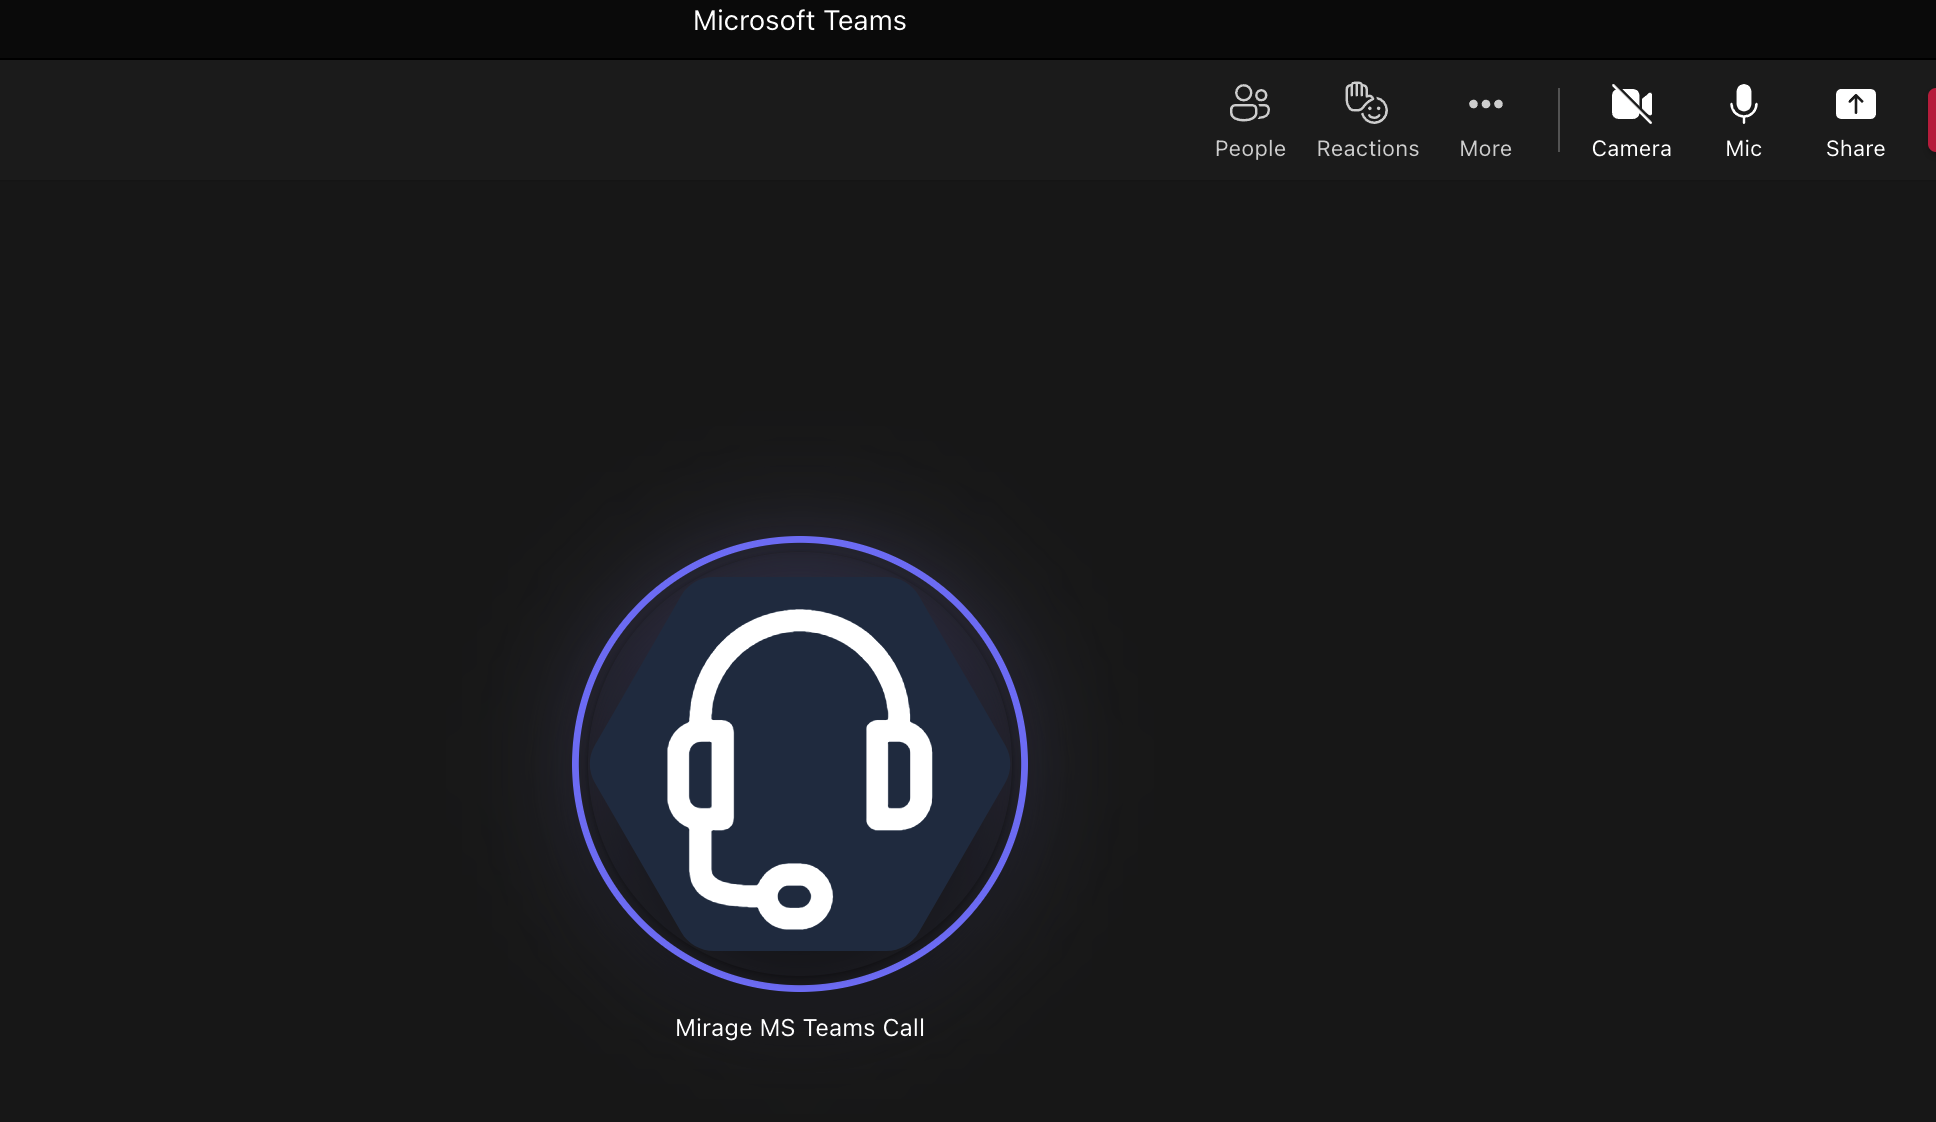
Default Resource Account Name
The name which is used for the Bot in the phone call and should match the resource account name you used when the resource account was created.
Go To Teams Admin Center - Voice - Resource Accounts
I
Default Resource Account Number
The phone number from the resource account which is used for outbound calls.
Go To Teams Admin Center - Voice - Resource Accounts
Use MS-Teams Call Queues
Check the box if you want to use your MS Teams Queues with Salesforce. After checking the box, new fields will appear where you need to provide the resource details from Azure.
MS-Teams configuration URL
Paste the Webhook URL which you created in your Runbook.
Read MS-Teams configuration timer (s)
The frequency at which the Queue configuration should be retrieved from MS Teams.
Azure Storage Account Name
Paste the Storage Account name in Azure.
Azure Storage Account Container Name
Paste the Container name from Azure, where the queue JSON file is located.
Call Queue File Name (JSON)
Enter the queue JSON file name, which is created by the Runbook in your Container.
Azure Storage Account Access Key
Paste the Access Key of your Storage Account in Azure.
Save Lost Call in Queue
If a caller terminates the call while waiting in a queue, this information can be saved in Salesforce and an e-mail can be sent to inform a user.
URL to Save Lost Call
In this field, you need to provide the URL generated in the ACD Setup, which creates a task for the lost calls in the queue.
Required Managed Package: Automatic Call Distribution for Salesforce (no license requried)

Requires Mirage MS-Teams Connector Premium license
Client ID
Add the Application (client) ID
Go to Home - Azure Active Directory - App Registrations and select the Mirage app
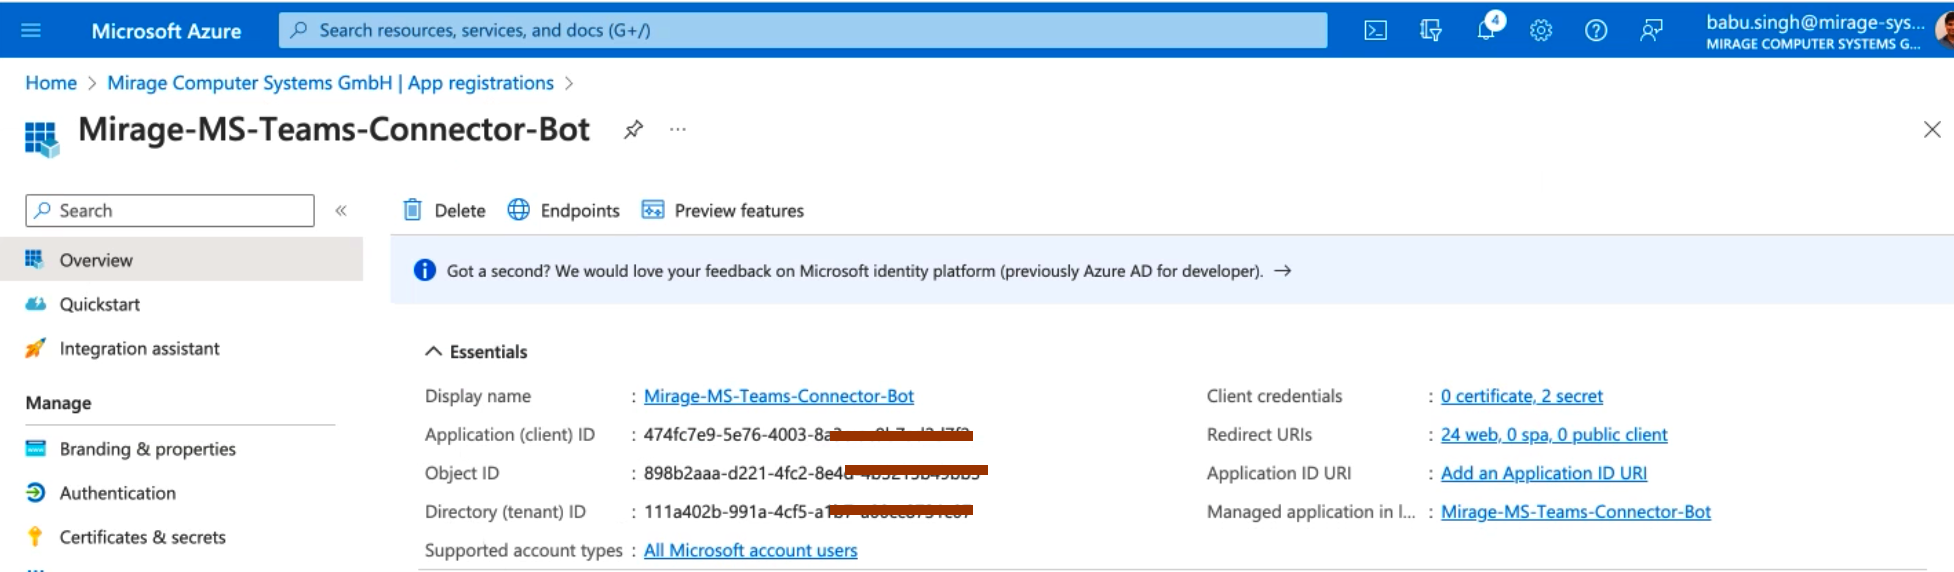
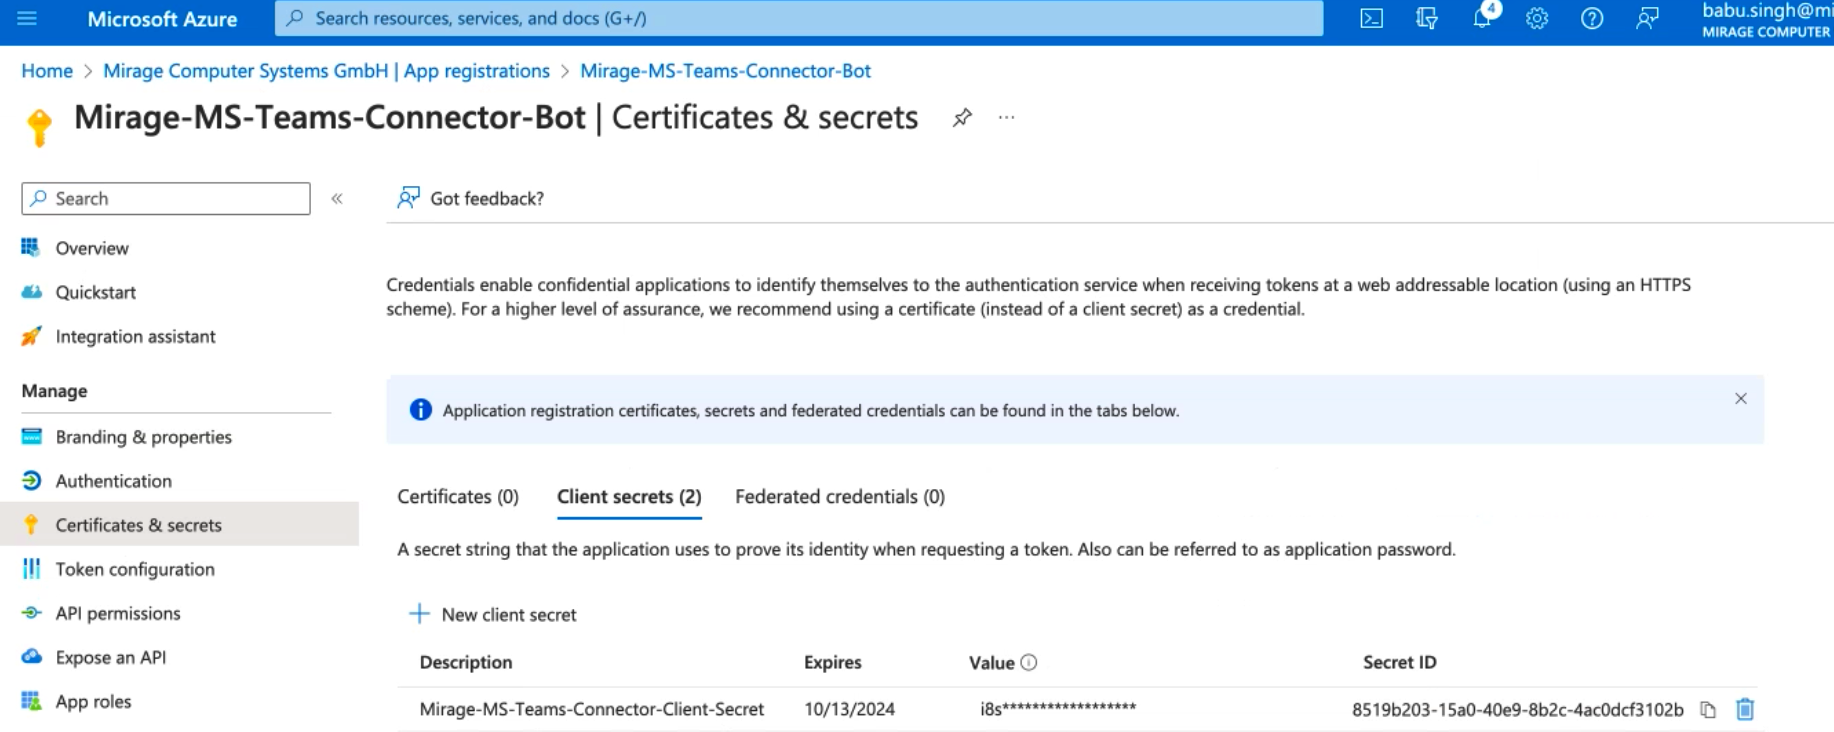
Client Secret
Go to Certificates & Secrets where you find the generated key. You need the value.
The client secret is visible one time when the key was created.
More information on how to generate a new secret.
Tenant ID
Directory (tenant) ID
Go to Home - Azure Active Directory - App Registrations and select the Mirage app
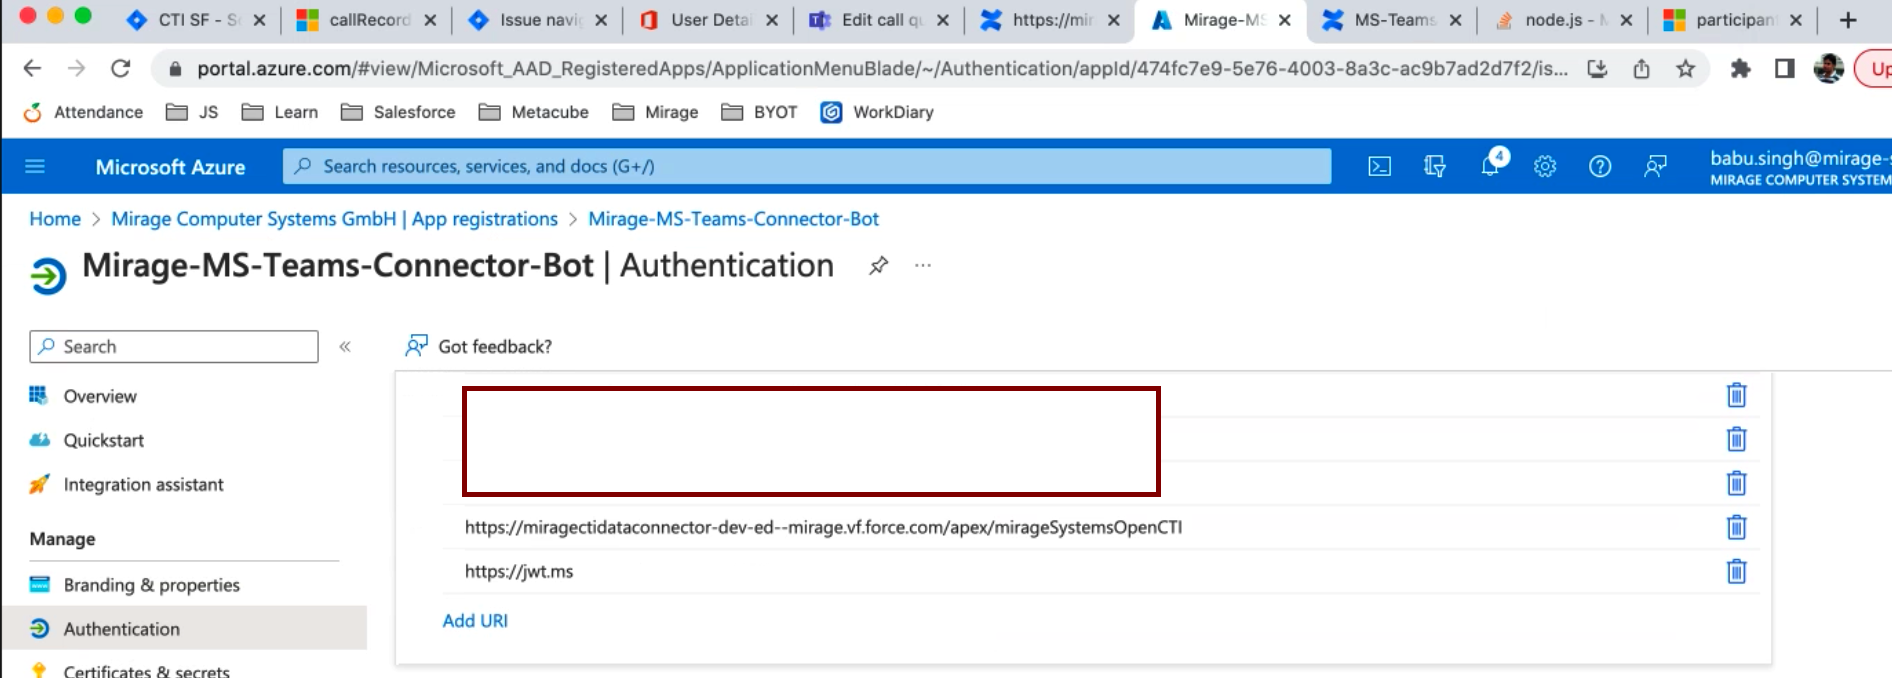
Redirect URI
This value is automatically generated.
Go to Authentication and add the URI
More information can be found here.
Some features require a Unaric Voice - Mirage MS-Teams Connector Premium Add-On license
