
Placetel CTI für Salesforce
Configure additional features for the CTI Data Connector SoftPhone.
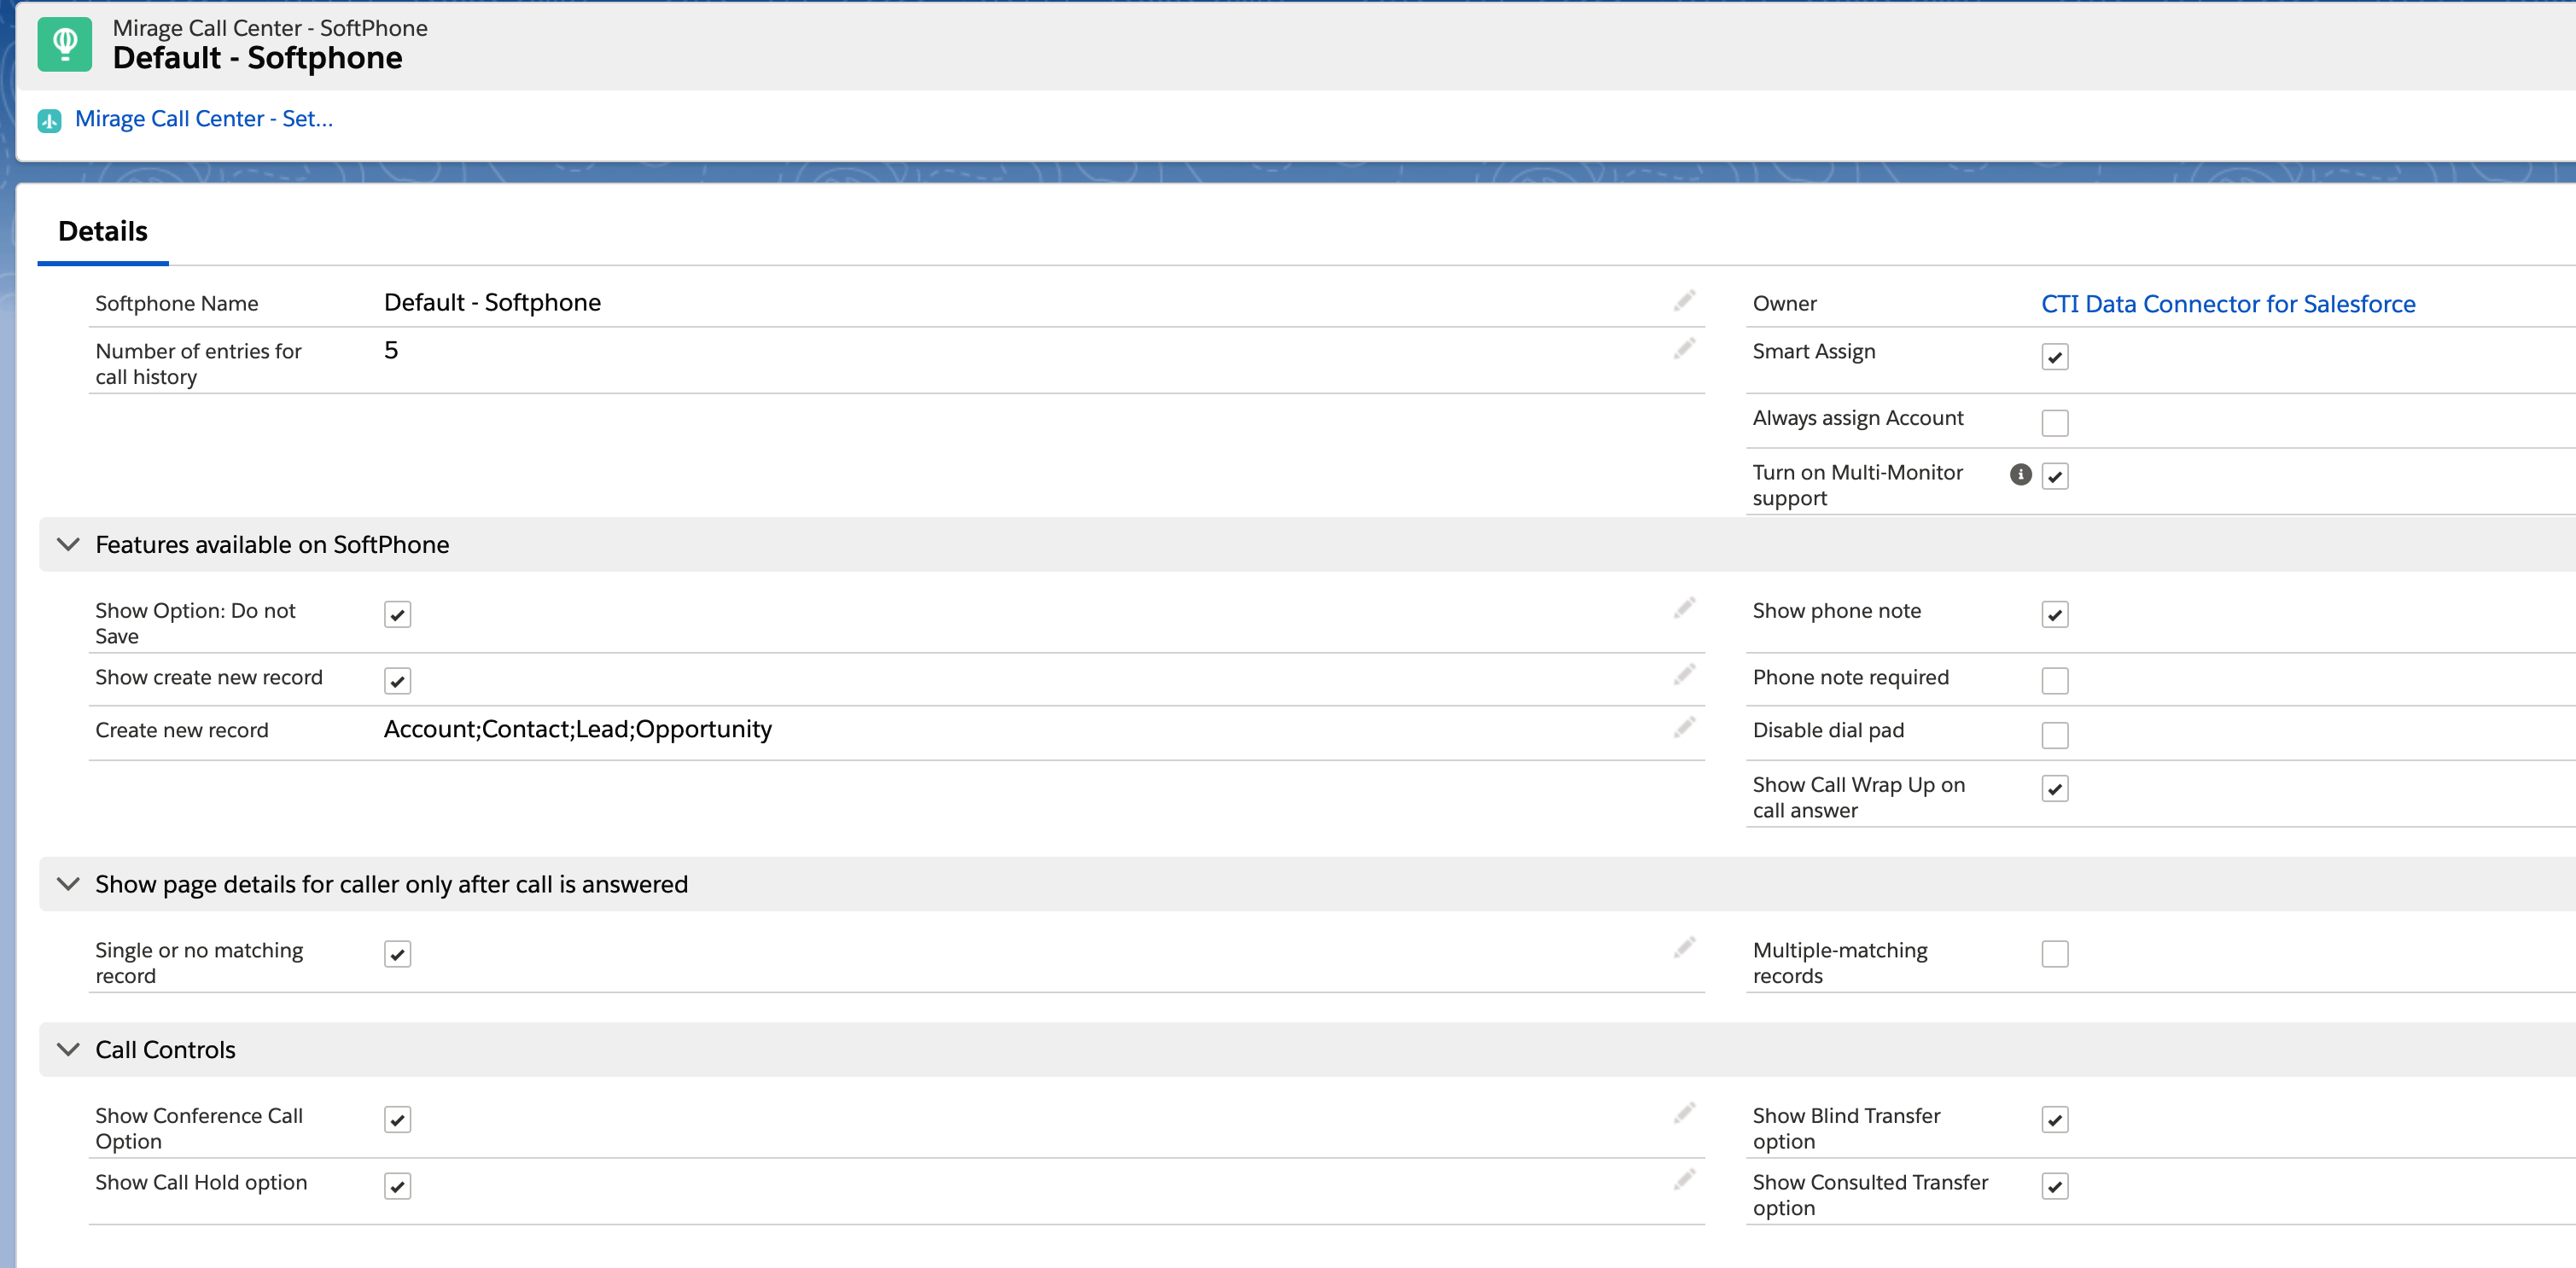
General Configuration
Number of entries for call history
Set the number of records which are displayed in the call history list
•Enabled (default) will automatically assign a record to a call once a user navigates to this record and there is no object assigned so far. Once an object is assigned it is not changed.
•No will only change the record when the Assign button is clicked to manually assign a new record
Details see Assign a call
Turn on Multi-Monitor support in Service Cloud
Allows to move the CTI Data Connector SoftPhone to another monitor or different screen area - details
Features available on SoftPhone
Option: Do not Save
Allows the user to not save one single call as an activity (e.g. for personal calls) - details
Disable dial pad
If enabled, the dialpad to dial in the CTI Data Connector SoftPhone does not show
The phone note can be disabled in case no notes should be typed in (e.g. in combination with the interaction log)
If the phone note is missing and the user clicks on the button: Save, he gets a message to add a note.
Hinweis
Der Telefonanruf wird immer gespeichert um sicherzustellen, dass die anderen Informationen aus dem Anruf nicht verlogen gehen.
Note
The phone call would still be saved to ensure that all other details of the call are not lost.
While a call is active and after the call (until Save button is clicked), a new record can be created - e.g. lead, opportunity or case. For Lead, Account and Contact the phone number will be automatically inserted. Other objects like cases will be automatically have the caller data (e.g. contact) inserted. The newly created record will be assigned to the call.
To activate this feature, check: Show create new record and then assign the objects you want to be available for the user to select.

You can add other records or custom objects. Open the object you want to add and retrieve the first 3 characters after the last / in the URL
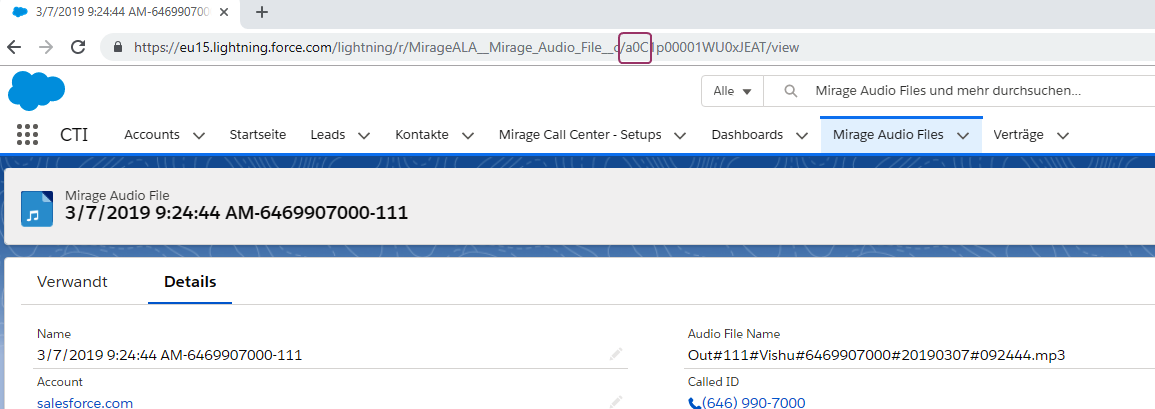
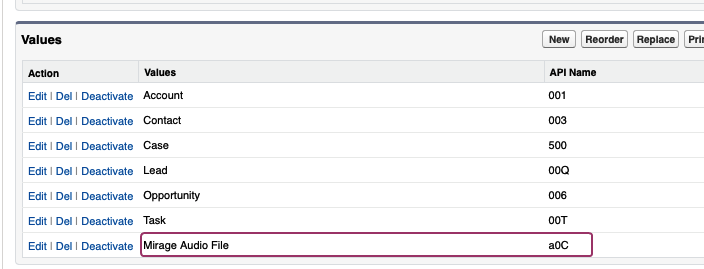
Then you need to add the object in the picklist
Select: Setup - Object and Fields - Object Manager
and here select Mirage Call Center - SoftPhone and the field: Create new record
Add your object. In the column: API Name add the 3 characters retrieved from the URL of the object (see above screenshots)
See: Create new record during call
Show page details for caller only after call is answered
This configuration decides, if the complete caller record details are loaded when the phone rings or only after the call is answered. This is recommended as the call can be answered without having to wait until the contact is loaded in a new TAB and for hunt groups the contact only loads for the user who answered the call.
Single or no matching record
If checked and a single record is found, it will display the caller record only if the call is answered.
Multiple-matching record
If checked and multiple records with the same phone number are found, it will display a list with all records only after the call is answered. It requires to configure Multiple-matching records: Pop to search Page in the Softphone Layout
Define which features / options are available for call control. As a lot of phone systems do not support all features (e.g. conference) with standard connectors, it makes sense to disable these options.
If supported, the conference call feature can be activated and the icon  will appear
If activated, a button  appears to put the call on hold while the call is active. If the phone integration does not support that, you can deactivate the option.
Option to enable the blind call transfer - details
Show consulted transfer option
Option to enable the consulted transfer
