
Unaric Voice
The integration between Microsoft Teams and Salesforce through the Unaric MS Teams Integration involves the use of a bot acting as a call manager in Teams. This documentation will guide you through the process of creating a Resource Account in Microsoft Teams and assigning a phone number to it. This phone number will be utilized by the Azure Bot to facilitate seamless communication between MS Teams and Salesforce.
Prerequisites
Before proceeding with the creation , ensure the following prerequisites are met:
•Azure Bot Created: The Azure Bot, acting as a call manager, should be created. If not done, refer to the documentation on creating an Azure Bot for Unaric MS Teams integration.
•Microsoft Teams Phone Resource Account License
•One additional phone number for a BOT (Calling Plan - charged by Microsoft. With direct routing you can use a number from the existing number block)
Steps to Create Resource Account in Microsoft Teams
Follow the steps below to create a Resource Account in Microsoft Teams and assign a phone number to it:
Step 1: Launch PowerShell from your computer
Step 2: Connect to Microsoft Teams Admin via Power Shell
Use the following command: Connect-MicrosoftTeams
Step 2: Add a new Resource Account
Create new Resource Account using the following command:
New-CsOnlineApplicationInstance -UserPrincipalName username@domain.com -ApplicationId replace-with-bot-app-id -DisplayName "Resource account name"
* replace the replace-with-bot-app-id with the Application (Client) ID of the Bot in Azure.
* replace username@domain.com with the new account’s email.
* replace Resource account name with the Resource account name.
Step 3: License assignment
Assign a Microsoft Teams Phone Resource Account License to the Resource Account:
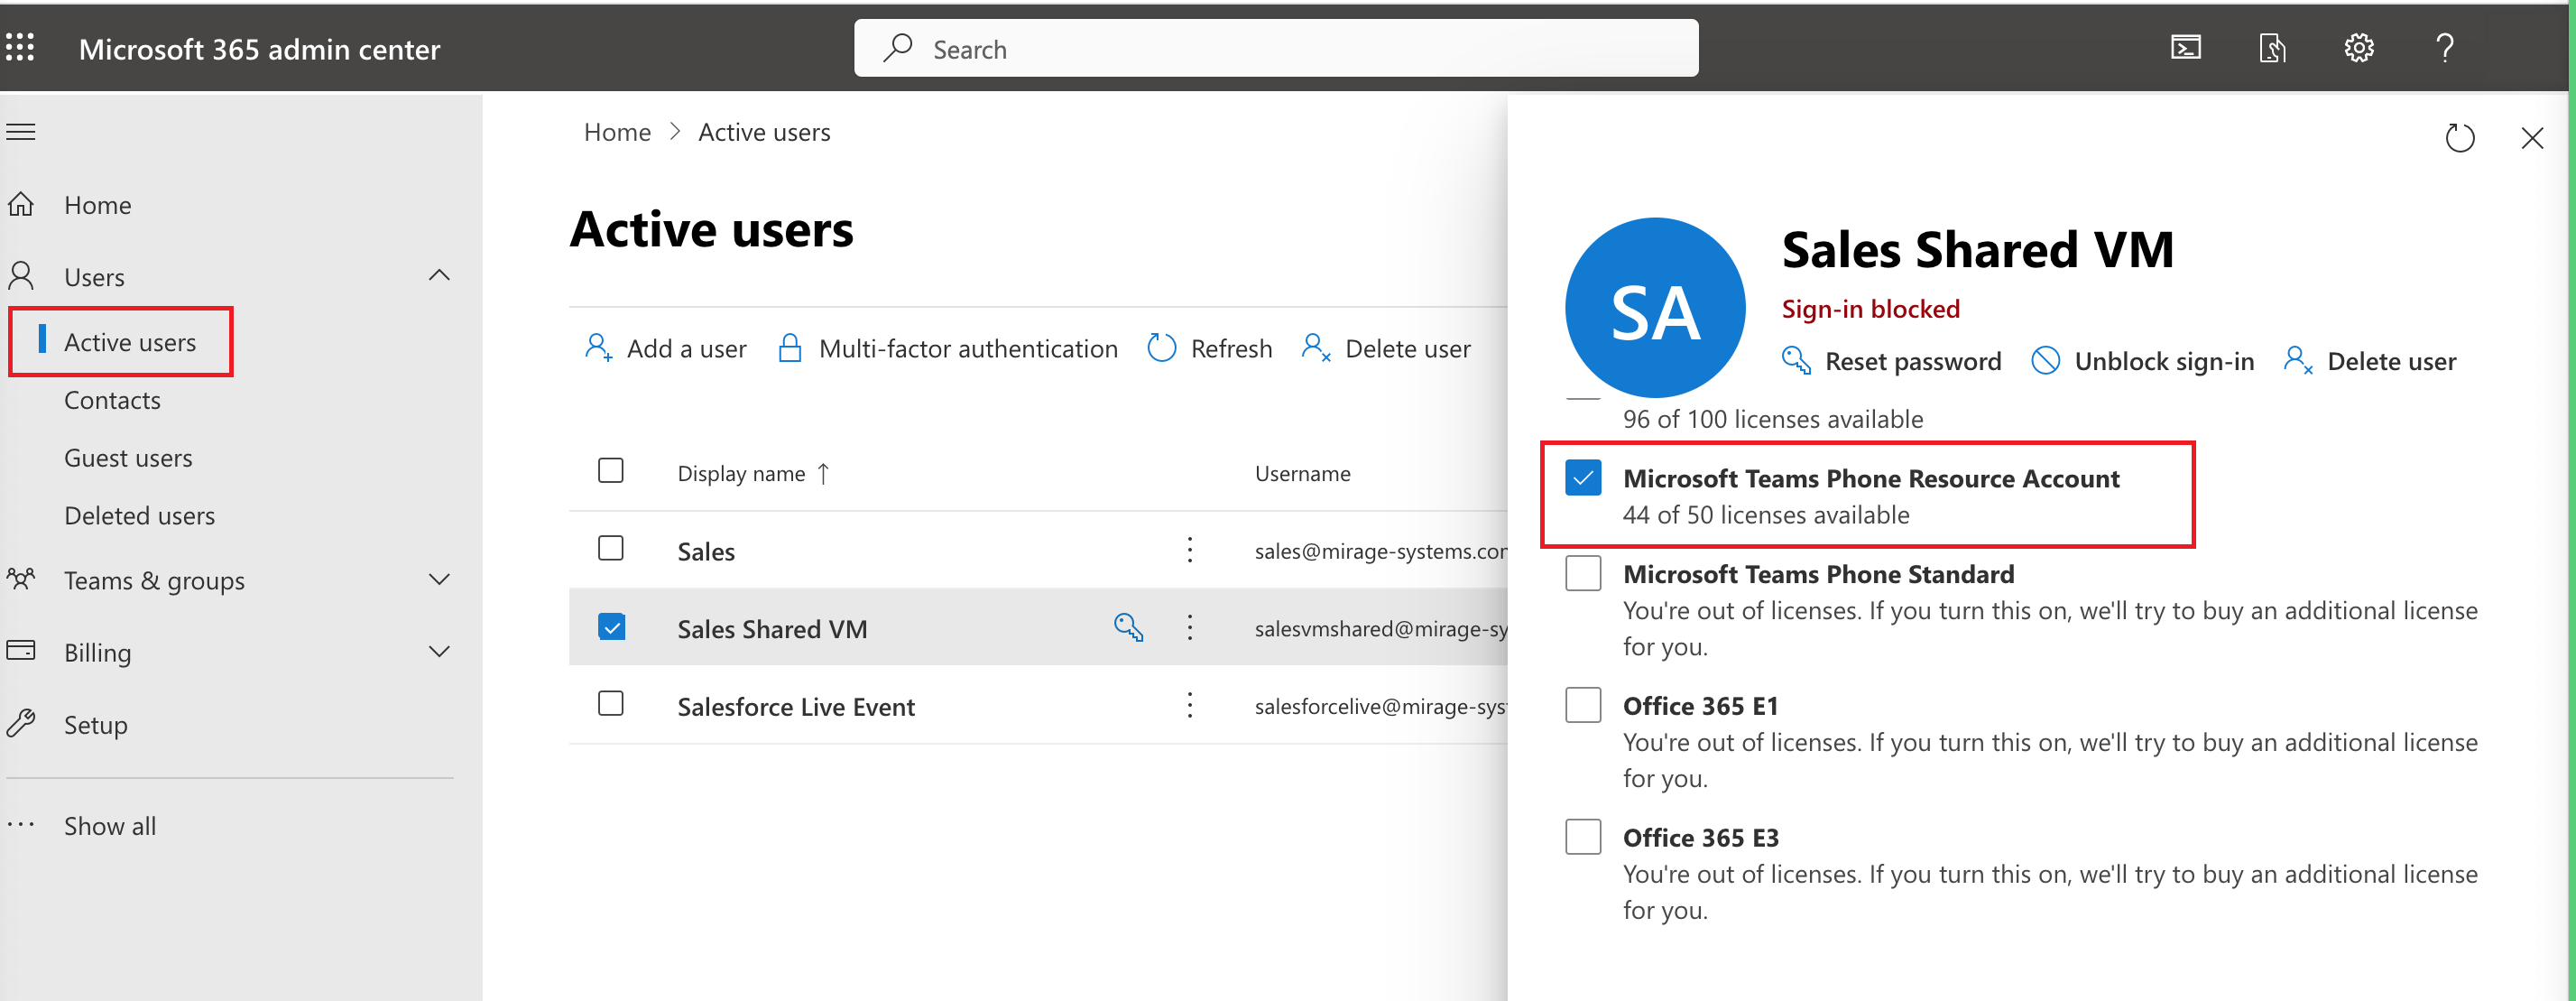
If you're using Microsoft Teams with CallingPlan, for outbound calls the Resource Account must have a Calling Plan assigned.
Step 4: Assign a Phone Number
Assign a Phone Number to the Resource Account using the following Power Shell command:
Set-CsPhoneNumberAssignment -Identity username@domain.com -PhoneNumber "+4900000000000" -PhoneNumberType DirectRouting
* replace username@domain.com with the account’s email.
* replace the phone number with the phone number you want to assign to the Resource Account.
Step 5: Assign the Resource Account to the Azure Bot
The Azure Bot needs an Resource Account in order to make phone calls, to do the assignment use the following Power Shell commands:
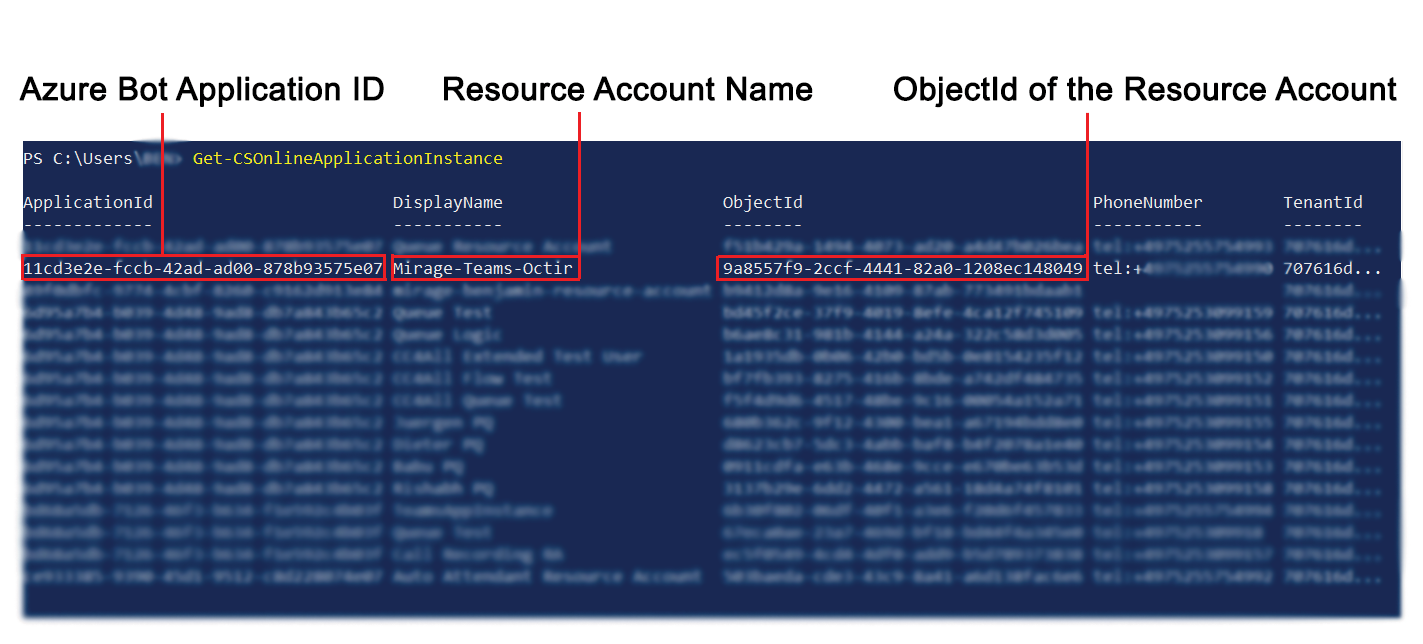
•Get the list of the Application Instances : Get-CSOnlineApplicationInstance
•Copy the ObjectId of the Resource Account and assign it to the Azure Bot's Application ID using the following command:
Set-CsOnlineApplicationInstance 9a8557f9-2ccf-4441-82a0-1208ec148049 -ApplicationId 11cd3e2e-fccb-42ad-ad00-878b93575e07
* replace 9a8557f9-2ccf-4441-82a0-1208ec148049 with the ObjectId of the Resource Account you copied in the previous step
* replace 11cd3e2e-fccb-42ad-ad00-878b93575e07 with the Azure Bot's Application ID
Step 6: Allow Azure Bot to remove participants during a call - required step
Use the following Power Shell command:
Set-CsApplicationMeetingConfiguration -AllowRemoveParticipantAppIds @{Add="11cd3e2e-fccb-42ad-ad00-878b93575e07"}
* replace 11cd3e2e-fccb-42ad-ad00-878b93575e07 with the Azure Bot's Application ID

In order to utilize Call Queues in Salesforce, it is necessary to assign the Resource Accounts of the Queues to the Bot, following the procedure outlined in Step 5 above.
