
Unaric Voice
Azure Automation Steps
1.Download the automation ZIP file.
2.Extract or unzip the folder.
3.Open Variables.tf in an editor and update the variable “name” of resource group at the beginning as per the customer name.
4.Open README.MD file in any editor and follow the steps mentioned in the file.
Do not run “terraform destroy” command
5.Now go to Azure portal → Subscriptions (select) → Resource Group.
6.Verify the resources created eg. Azure bot calling URL and Runbook (run it once)
Create required MS-Teams Resource accounts and assign phone number
a.Via windows power shell - Open power shell and run the following commands
i.Connect-MicrosoftTeams
ii.Enter the MS admin credentials
iii.New-CsOnlineApplicationInstance -UserPrincipalName username of resource account -ApplicationId azure app client id -DisplayName name of resource account
iv.Example - New-CsOnlineApplicationInstance -UserPrincipalName msteams.call@mirageteams.com -ApplicationId bd68a5db-7126-46f3-b634-f1e592c4b03f -DisplayName "MSTeamsTeamsAppInstance"
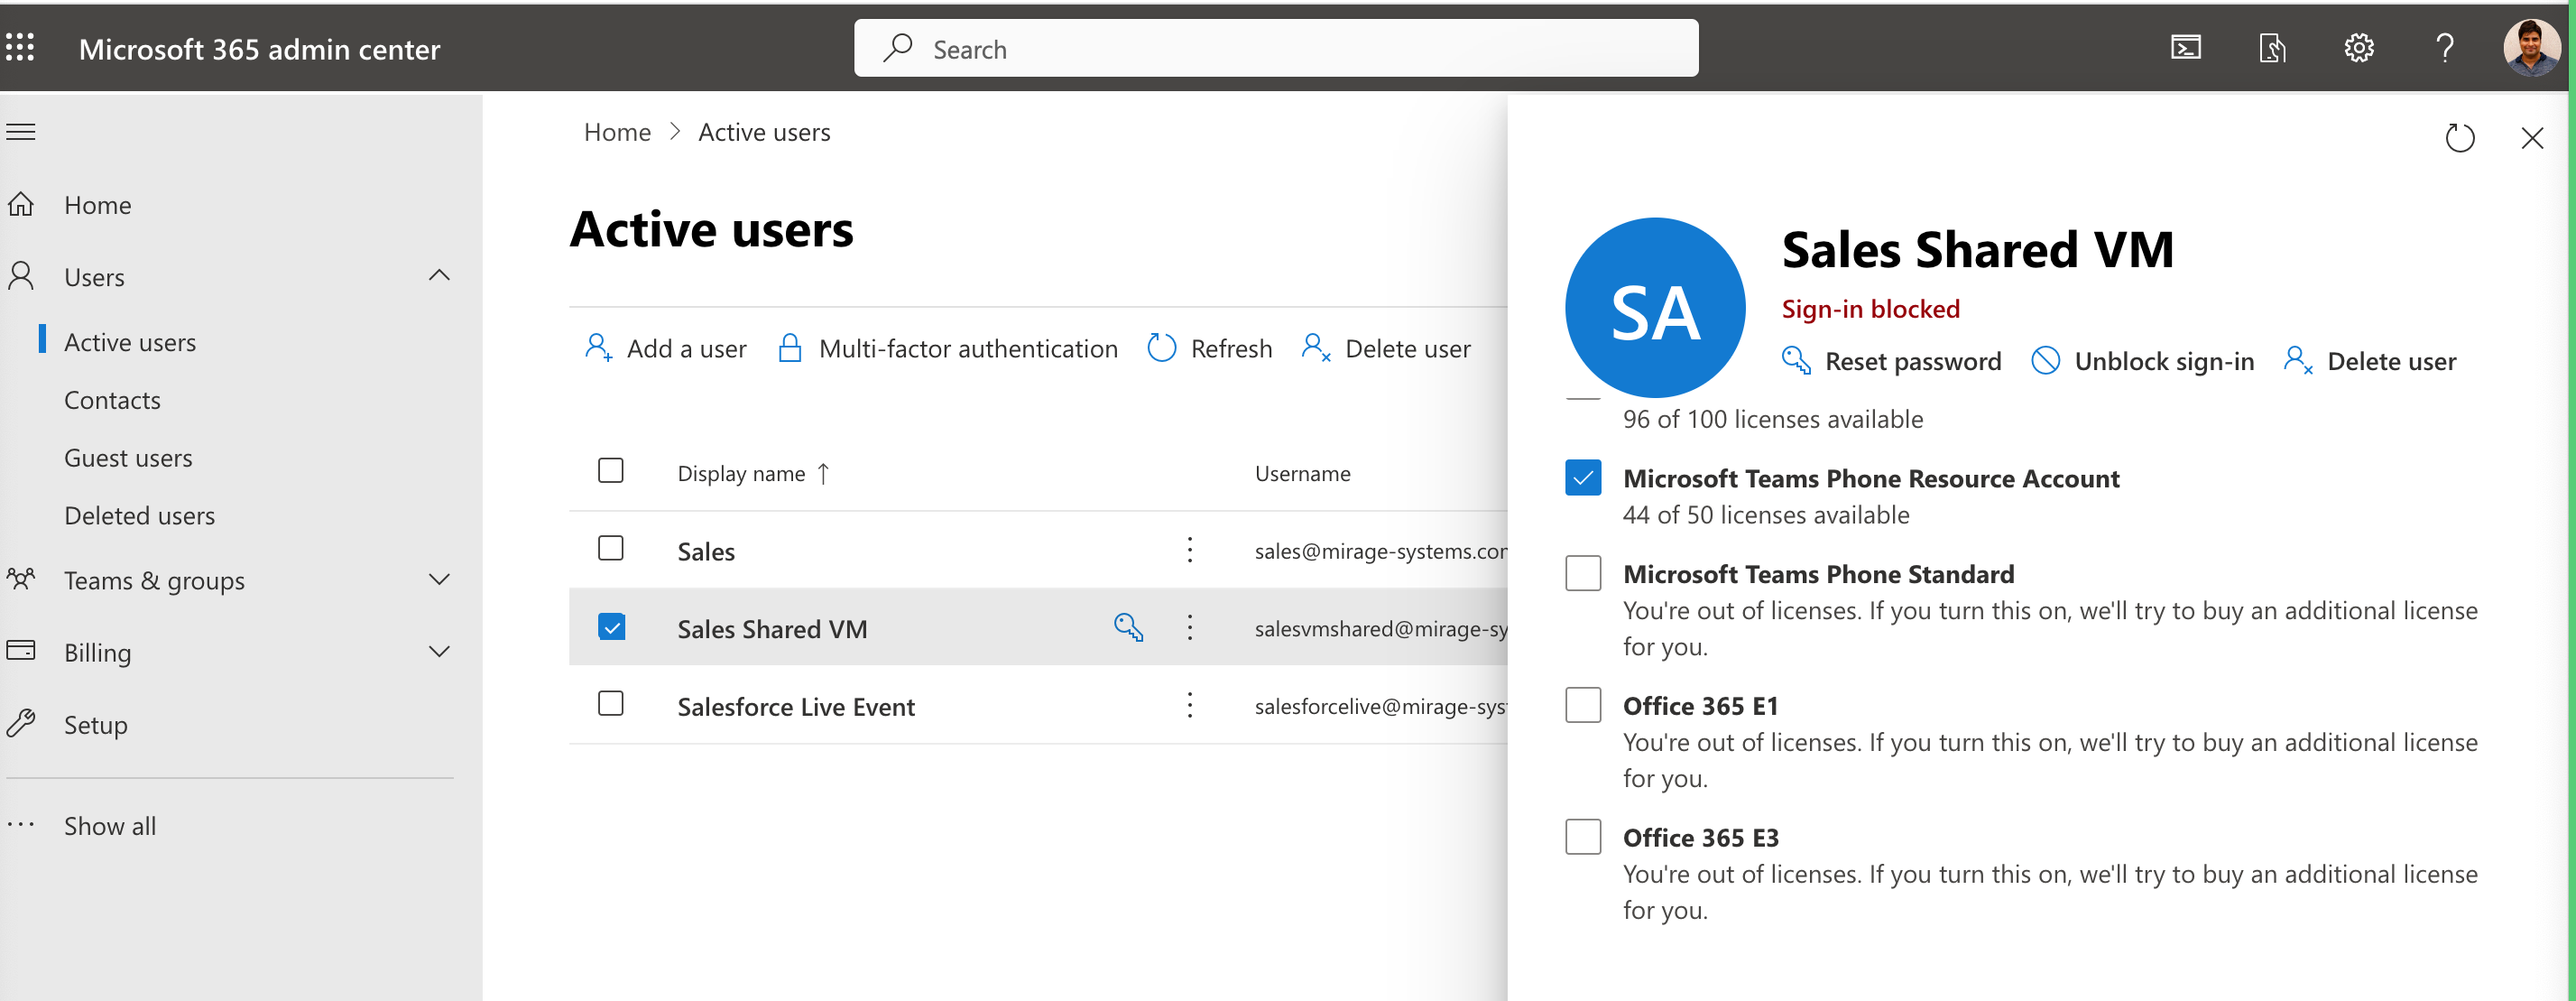
v.Go to Microsoft Admin and select active users
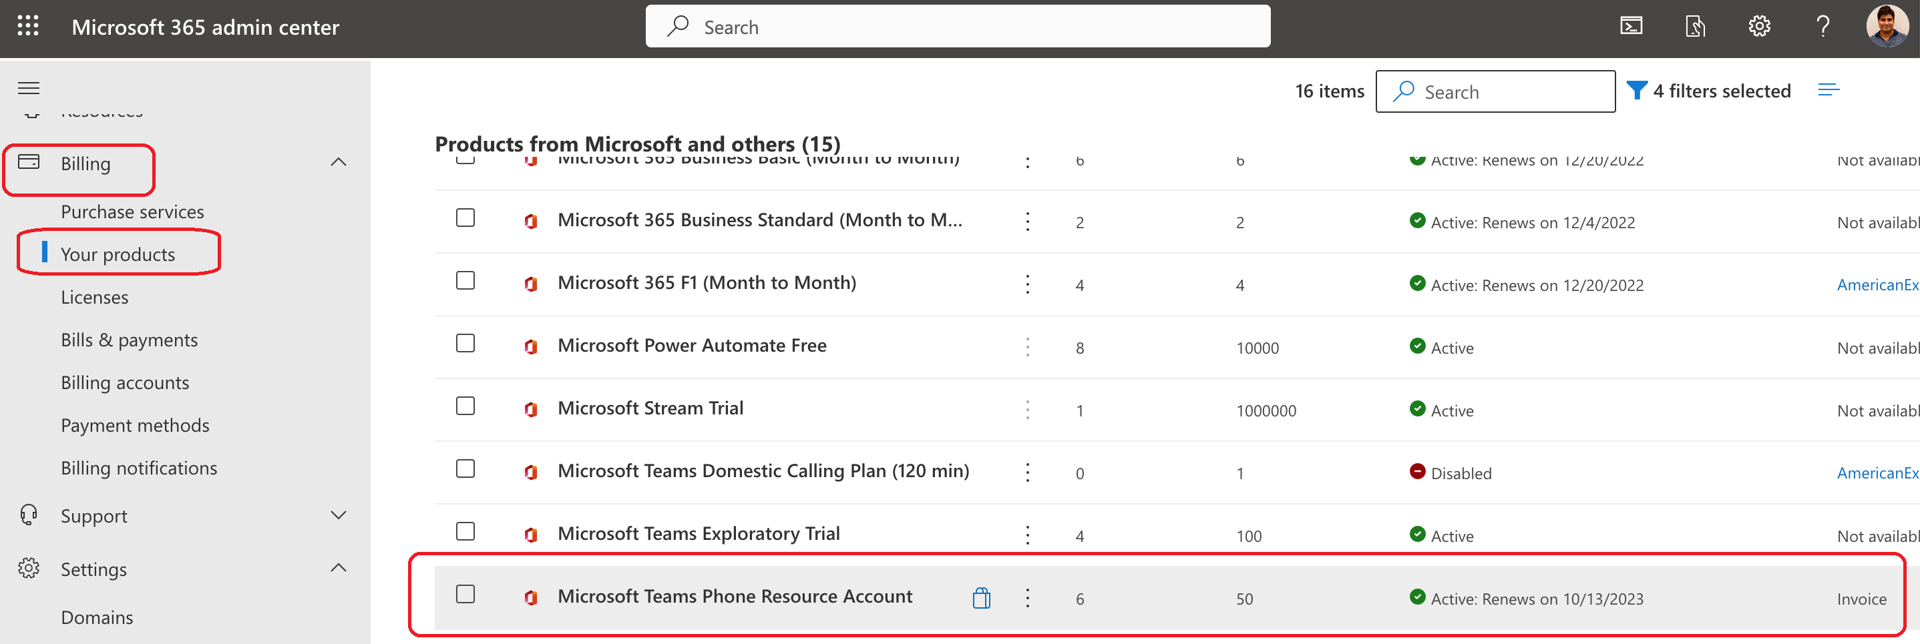
vi.Select resource account and add license for Phone Resource Account. If the license is not there buy it from billing section.
vii.Set-CsPhoneNumberAssignment -Identity username of resource account -PhoneNumber bot phone number example +497525309901 -PhoneNumberType type like CallingPlan or DirectRouting.
viii.Example - Set-CsPhoneNumberAssignment -Identity msteams.call@mirageteams.com -PhoneNumber "+4975253099099" -PhoneNumberType DirectRouting
ix.Check voice routing policy on resource account in teams admin. Change it to correct one if needed.
x.If voice routing policy is updated run Set-CsOnlineApplicationInstance object id of resource account -ApplicationId client id of azure app
xi.Example - Set-CsOnlineApplicationInstance 9a8557f9-2ccf-4441-82a0-1208ec148049 -ApplicationId bd68a5db-7126-46f3-b634-f1e592c4b03f
b.For end call via API require to run this command via Power shell -
i.Set-CsApplicationMeetingConfiguration -AllowRemoveParticipantAppIds @{Add="client id azure"}
ii.Get-CsApplicationMeetingConfiguration
7.Using the Microsoft Teams admin center - always check and do this.
8.In the left navigation, go to Meetings > Conference bridges.
9.At the top of the Conference bridges page, click Bridge settings.
10.In the Bridge settings pane, select:
Meeting entry and exit notifications
If you turn this off, users who have already joined the meeting won't be notified when someone enters or leaves the meeting.
Configure one MS-Teams user for Salesforce integration
1.User must have phone license and a number assigned via MS teams calling plan or direct routing.
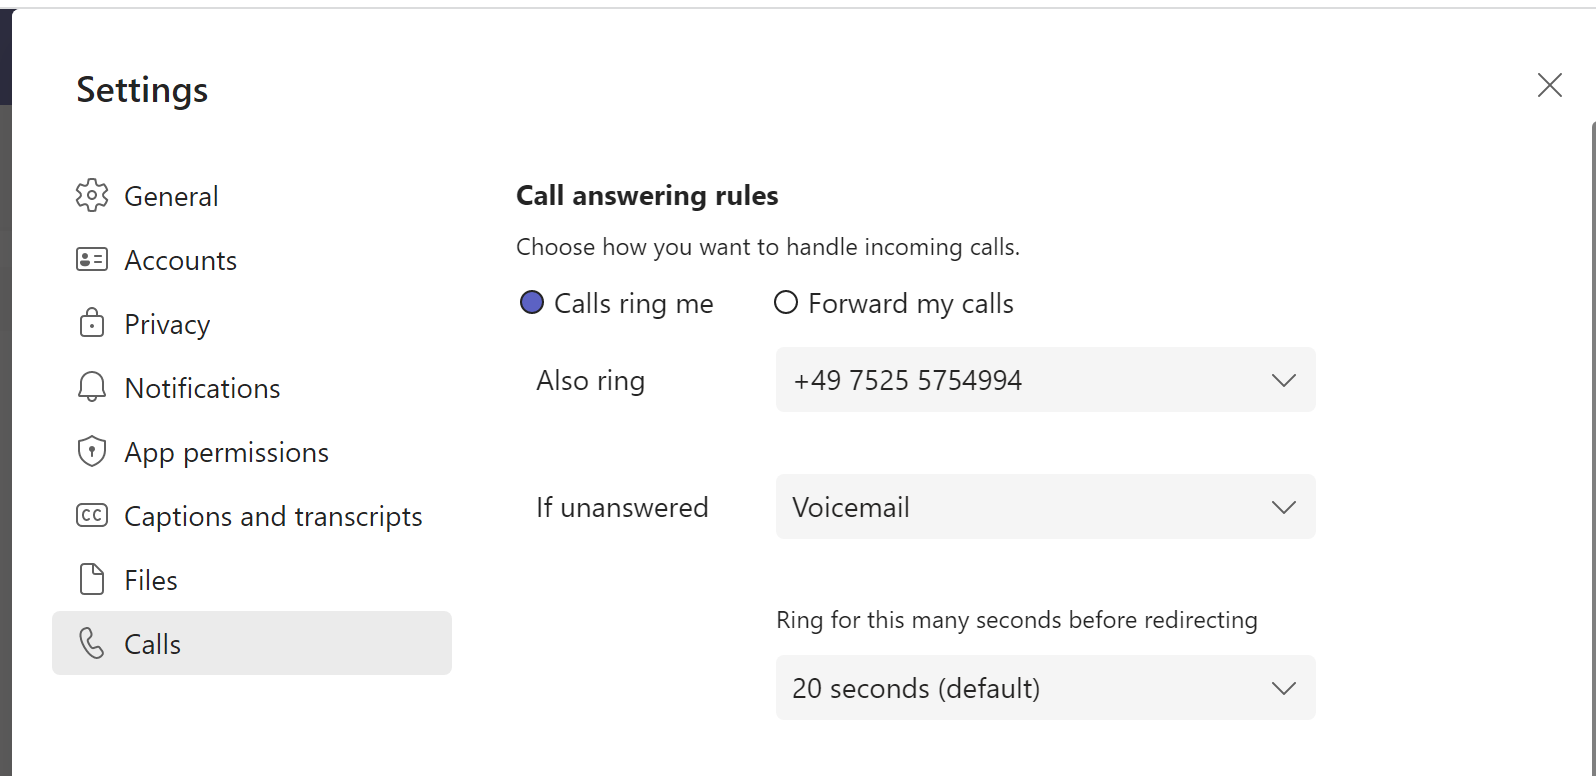
2.Go to user MS teams client and calls tab and select right and select More Settings and configure the ring also setting to bot number
Salesforce Needed Values and its source
1.Client Id / Entra app ID - Azure App Overview Section Client ID
2.Tenant Id - Azure App Overview Section Tenant ID
3.Client Secret
4.Office 365 Email Address of users
5.Resource Account Name - From teams admin center
6.Resource Account ID - From azure portal - users - object id
7.Resource Account Number - From teams admin center
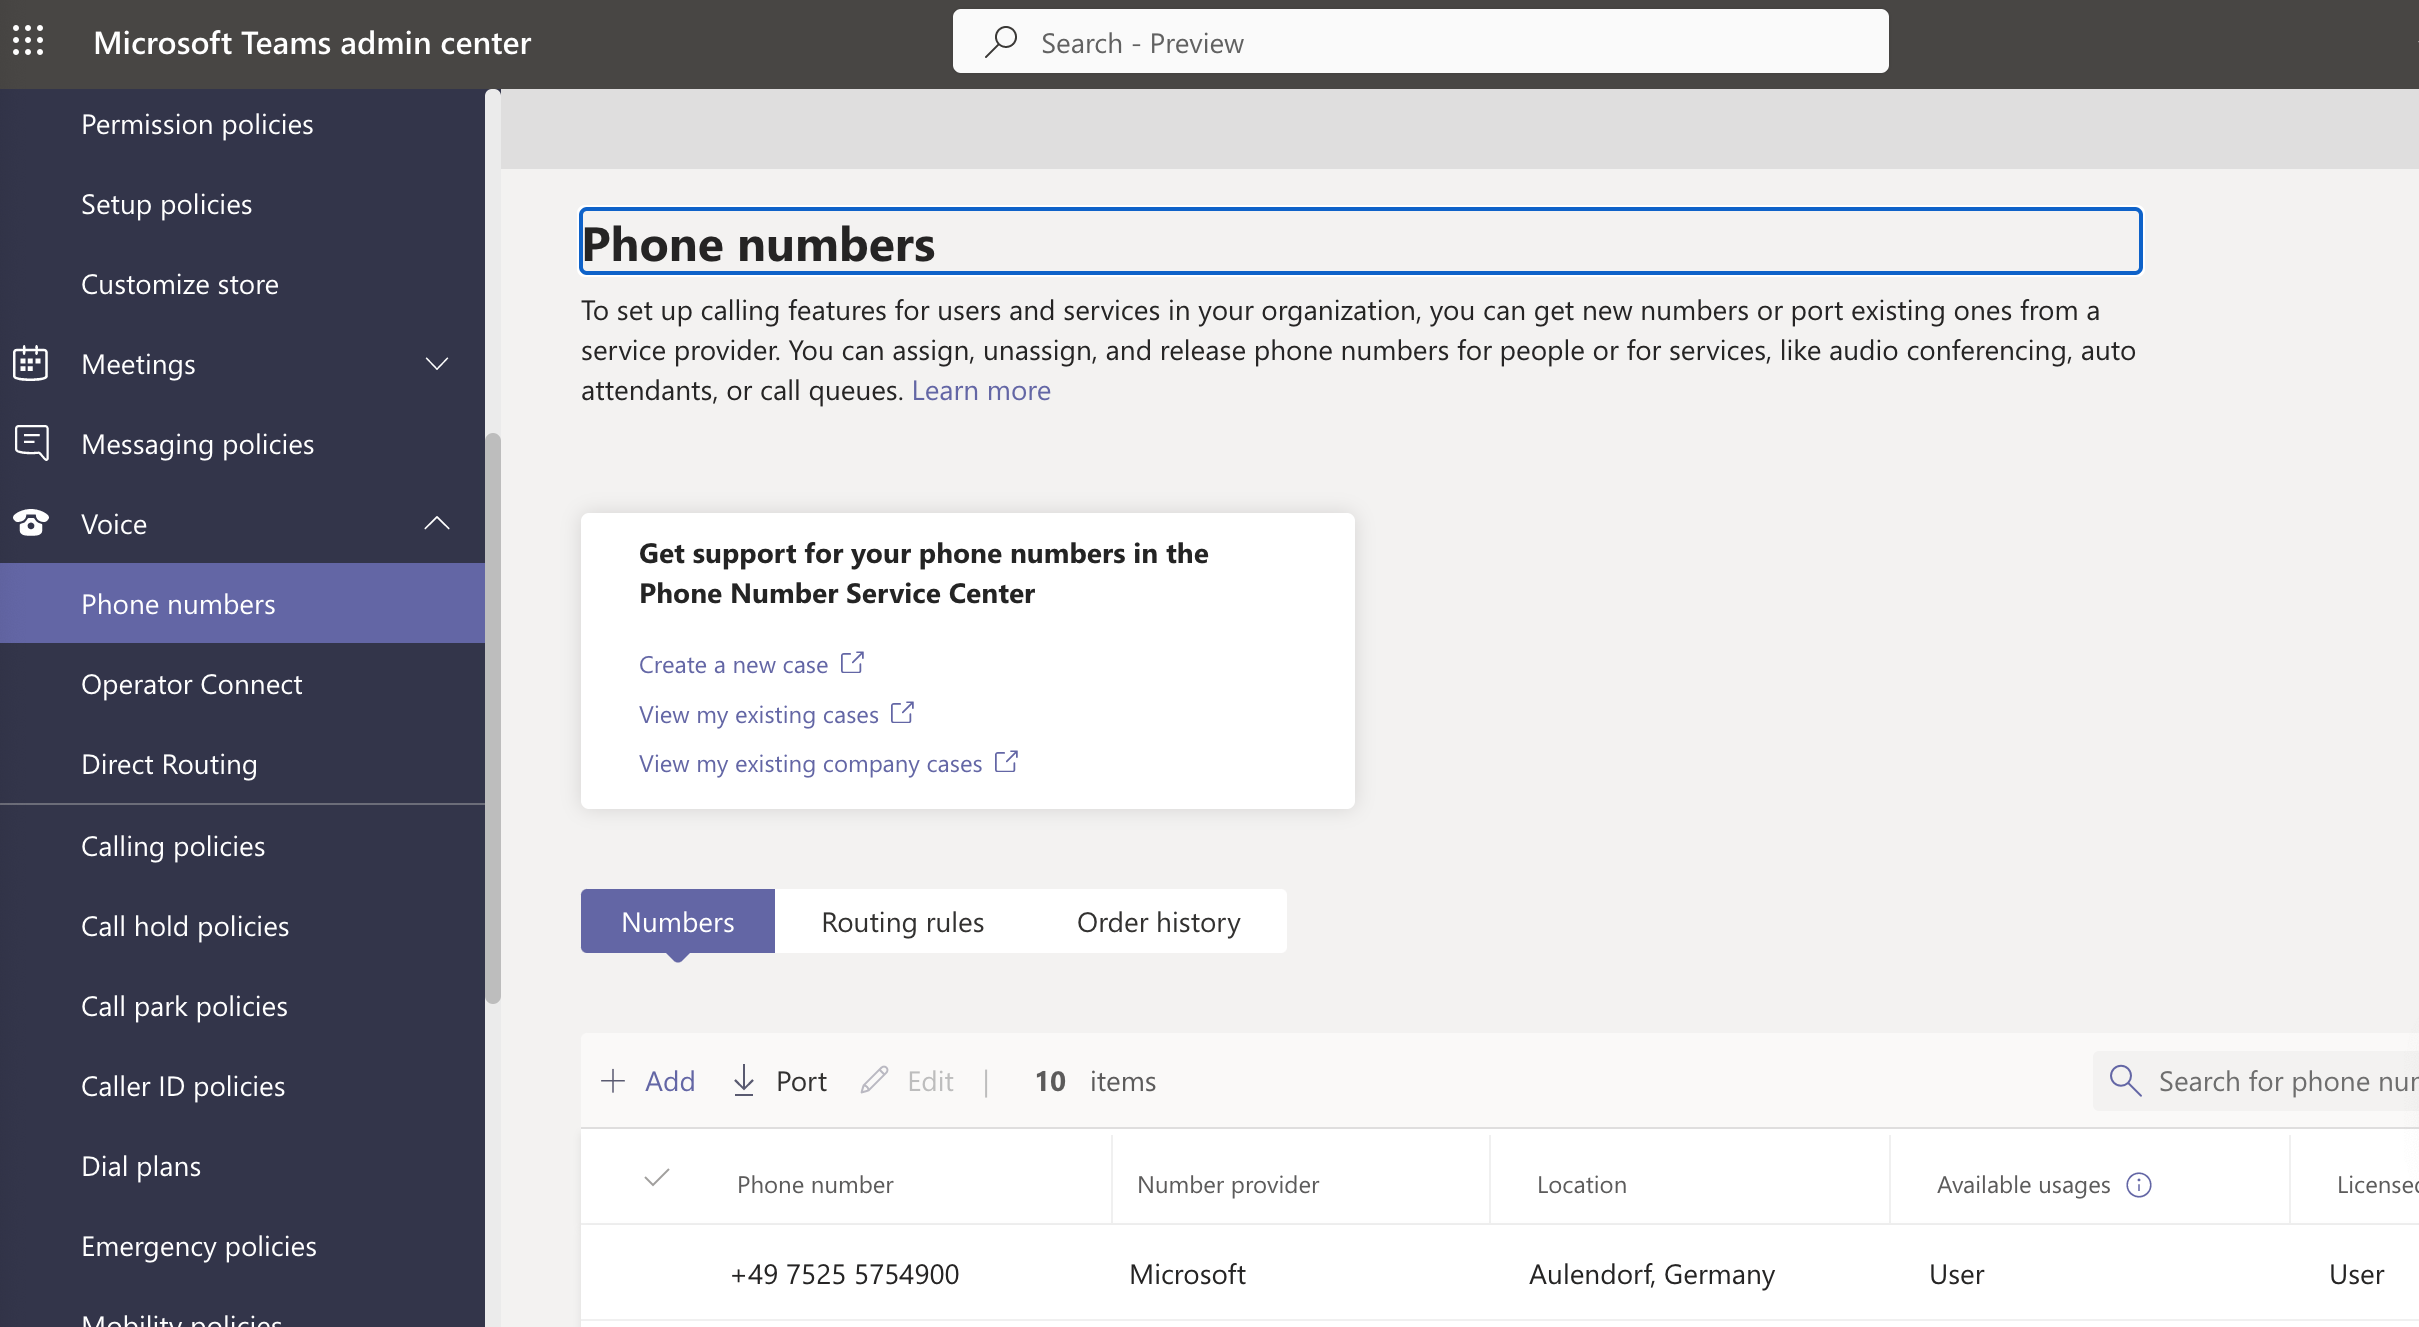
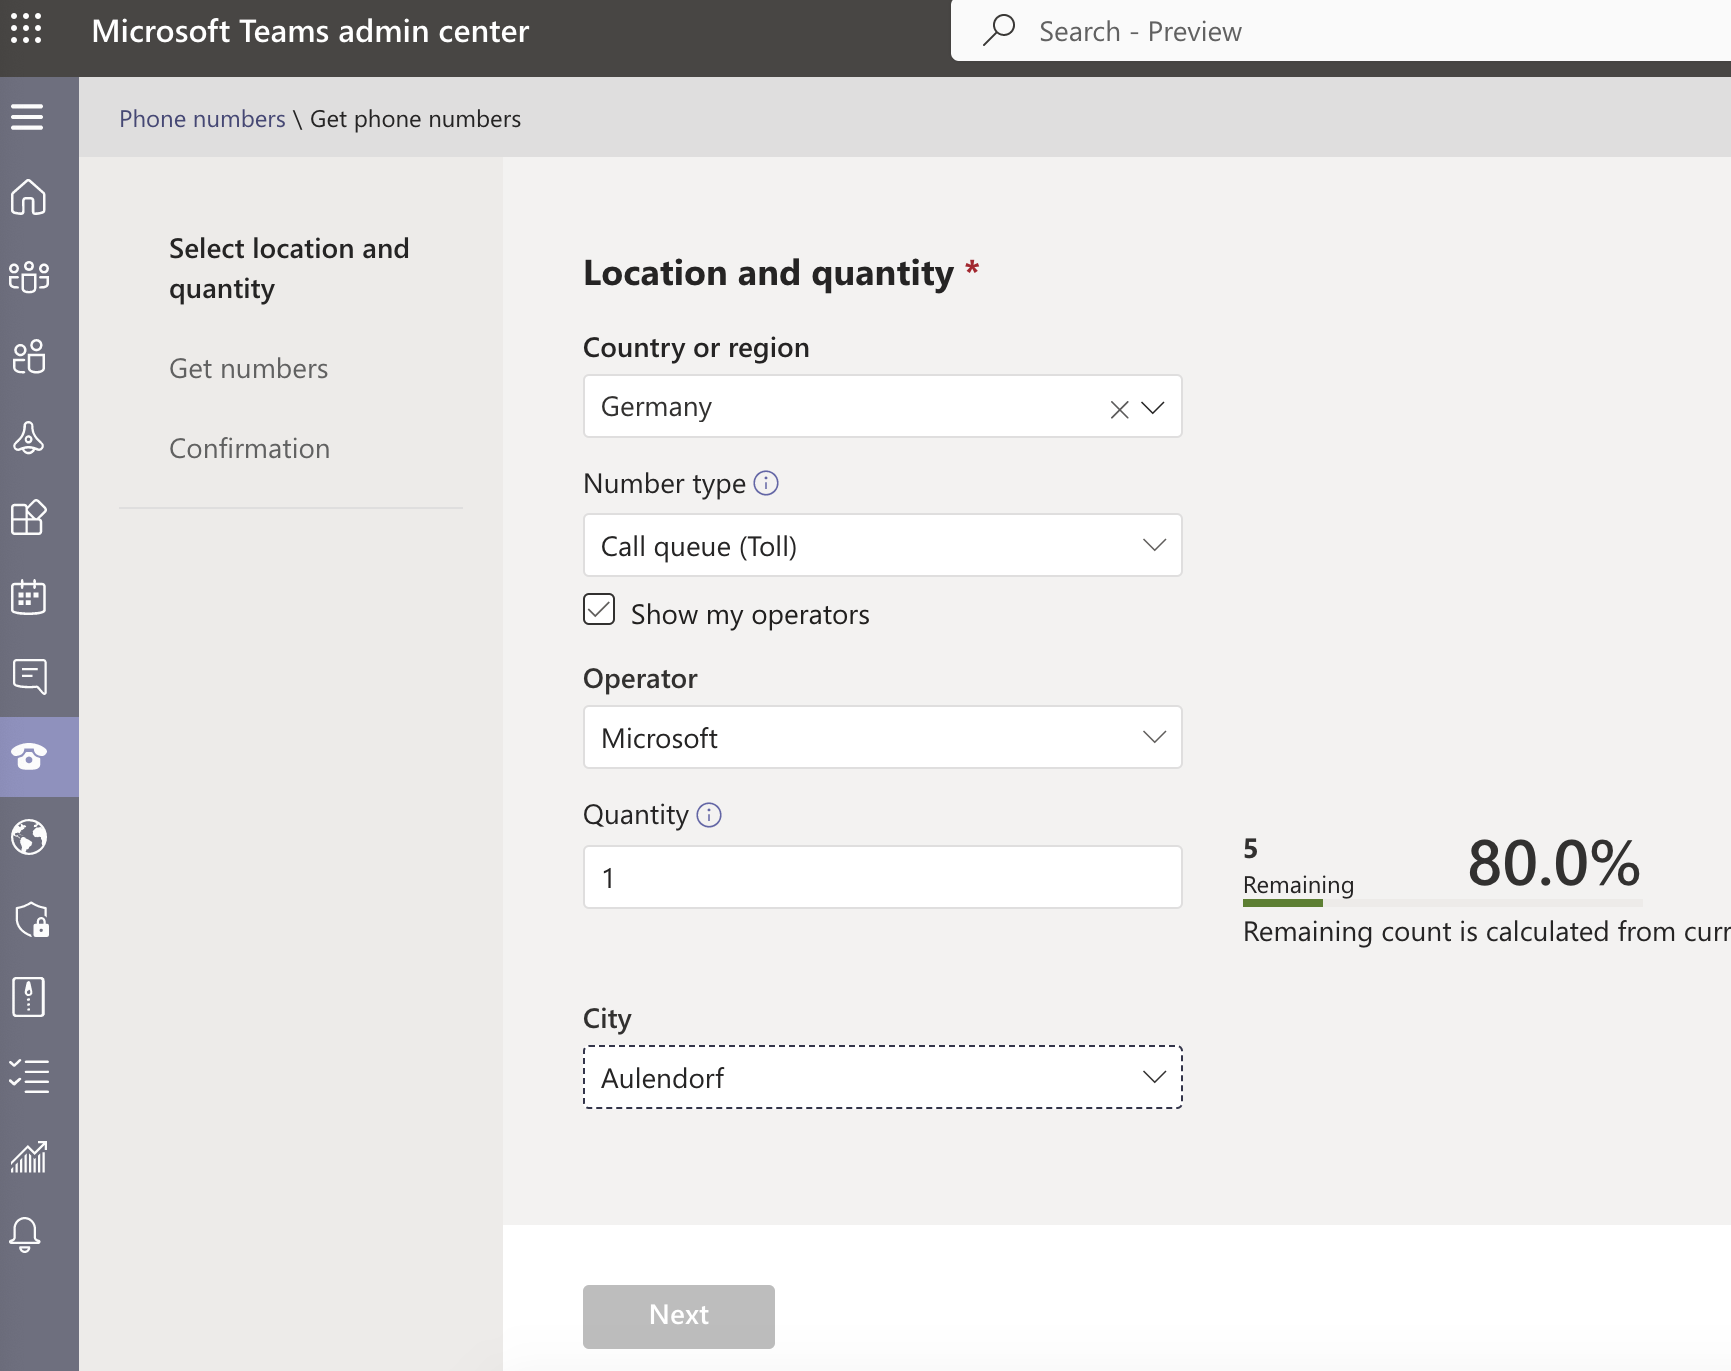
Buy a Call Queue Toll Number from Teams Admin Center for Teams calling plan
•Login into teams admin center
•Go to phone number menu
•Click on Add
•Fill required info and select phone number type Call Queue Toll
•In case your limit is reached, create a case for the same
Changes to be done for call queue numbers
Assign all call queue numbers(Resource Accounts) to bot. All Assign calling ids(Resource Accounts) which needs to be used for outbound calling must also be assigned to bot
1.Login into Powershell
2.Connect-MicrosoftTeams
3.Get-CSOnlineApplicationInstance (To find the resource account object id)
4.Set-CsOnlineApplicationInstance resource-account-objectid -ApplicationId client-id-azure-active-directory
5.Example: Set-CsOnlineApplicationInstance 23ea3421-638d-4256-a264-a80bcccb63d1 -ApplicationId 474fc7e9-5e76-4003-8a3c-ac9b7ad2d7f2
Changes to be done for Web Meetings
Open windows power shell and run following commands:
1.Set-ExecutionPolicy -Scope Process -ExecutionPolicy Bypass
Then click Yes to All.
2.Connect-MicrosoftTeams
3.If command does not work it means teams module is not there then run -
a.Install-Module -Name MicrosoftTeams
b.Connect-MicrosoftTeams
4.Enter the MS admin credentials
5.Get-CsApplicationAccessPolicy
6.New-CsApplicationAccessPolicy -Identity "Name of Application Access Policy" -AppIds "client id of azure app"
7.Set-CsOnlineApplicationInstance object id of resource account -ApplicationId client id of azure app
8.Get-CsGroupPolicyAssignment
9.Grant-CsApplicationAccessPolicy -PolicyName "Name of Application Access Policy" -Group "16864e37-d920-4112-899f-58cbd6b0aecc"
