Click ![]() on the icon to start the application
on the icon to start the application
When you launch the Amazon Connect SoftPhone by Mirage the very first time, you get the configuration screen.
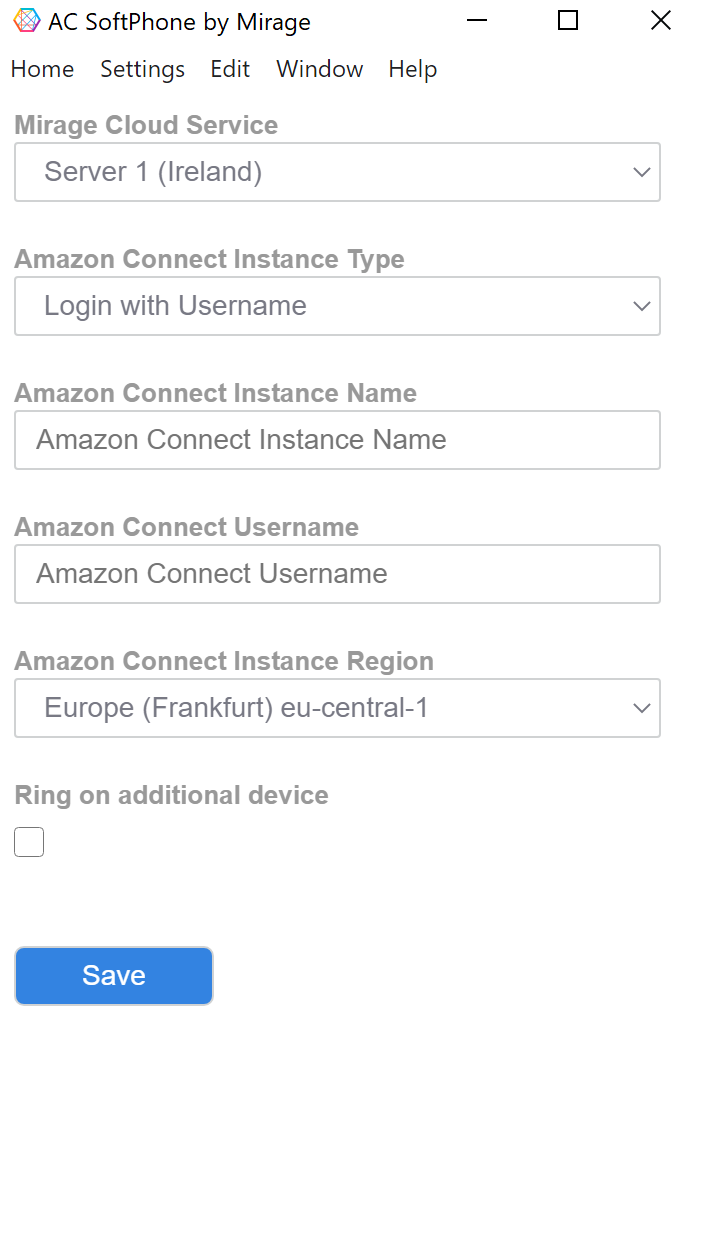
Mirage Cloud Service
Select the data center for the Mirage Cloud Service. This is required to launch the Web based part of the Amazon Connect SoftPhone by Mirage. No data is stored there.
Amazon Connect Instance Type
Select the instance type of your Amazon Connect instance whether user name based or single sign on.
Username based configurations
Amazon Connect Instance Name
Type in the instance name of your Amazon Connect instance.
Amazon Connect Username
Type in the user name of your Amazon Connect instance.
Amazon Connect Instance Region
Select the region of your Amazon Connect instance.
Ring Device
You can select an own device for ringing. This makes sense as the default output device is typically the headset while you want to have the loudspeaker of the computer as the ring device.
Single Sign On (SSO) based configurations
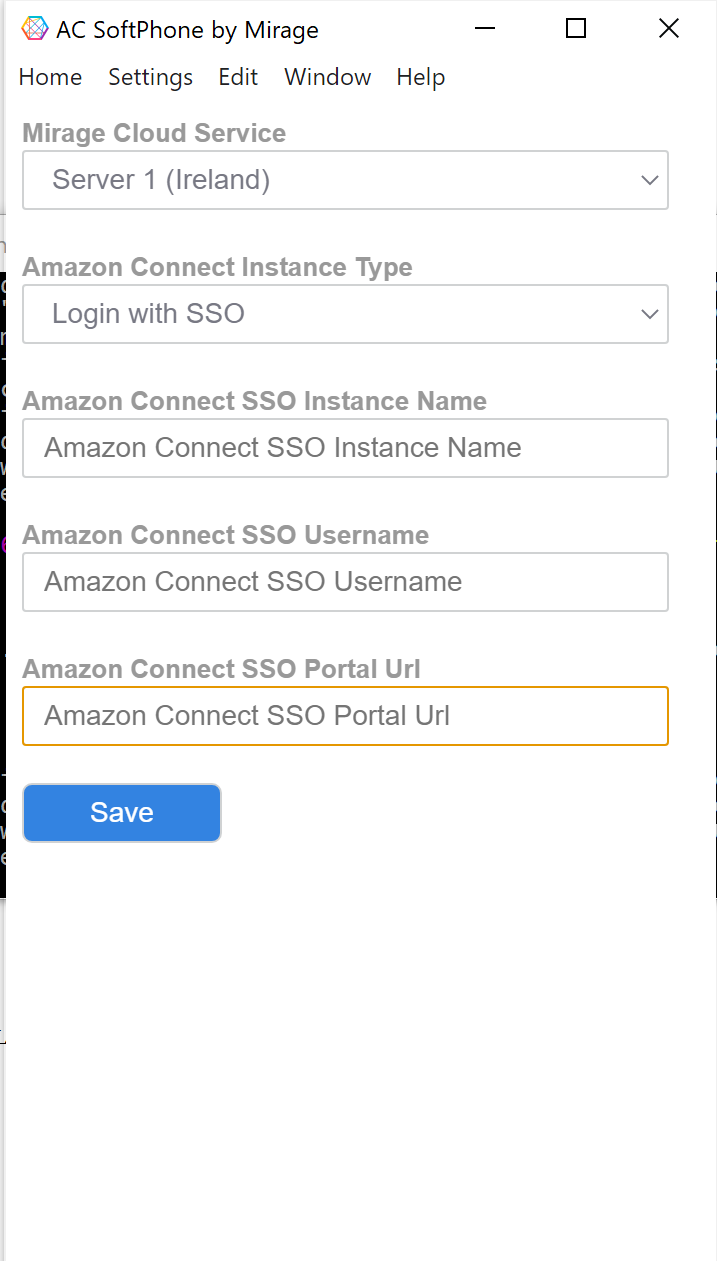
Amazon Connect Instance Name
Type in the instance name of your SSO based Amazon Connect instance.
Amazon Connect Username
Type in the user name of your SSO based Amazon Connect instance.
Amazon Connect SSO Portal Url
Create a SSO portal using Amazon Single Sign On to use SSO based Amazon Connect in the Amazon Connect SoftPhone by Mirage
Follow the steps in the link to create SSO portal using AWS Single Sign On
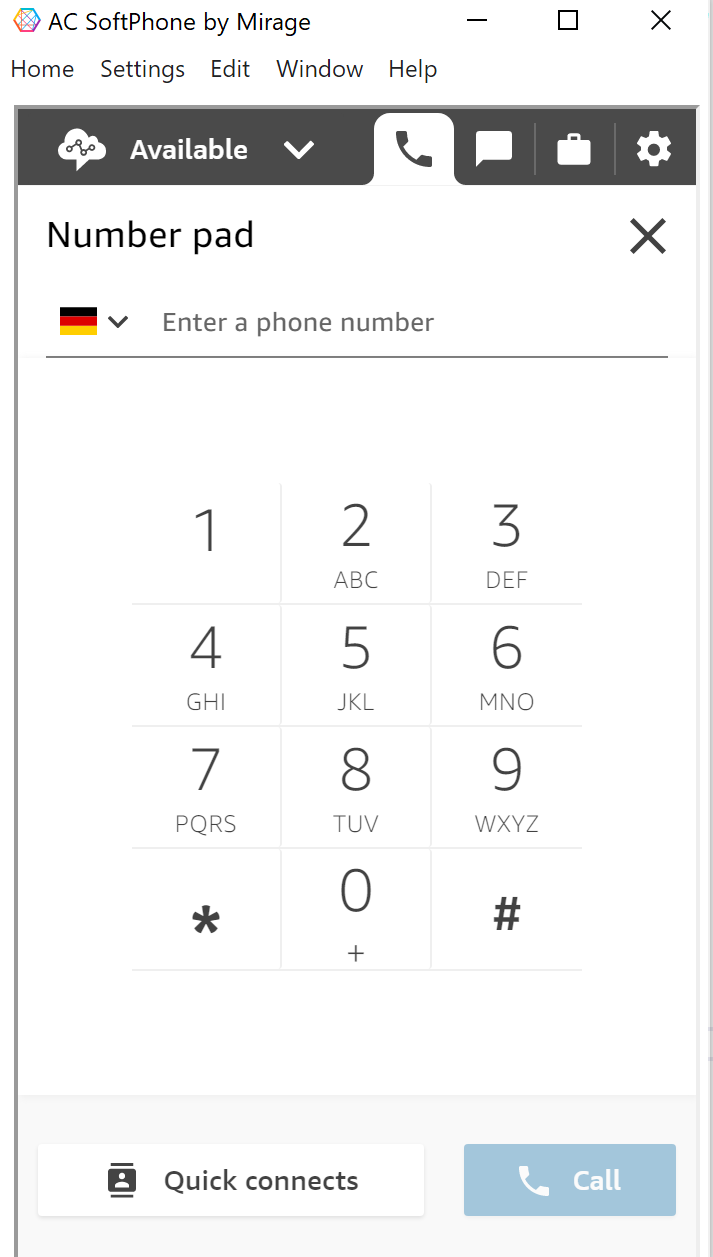
On click of save button, you will be logged in to the Amazon Connect CCP and can start calls or accept chat.
The AC Softphone by Mirage internally uses the Contact Control Panel (CCP). This ensures that always the full feature set, which the Amazon Contact Control Panel offers, is available. It includes call transfer, conference call as well as forwarding the call to a mobile.
![]()
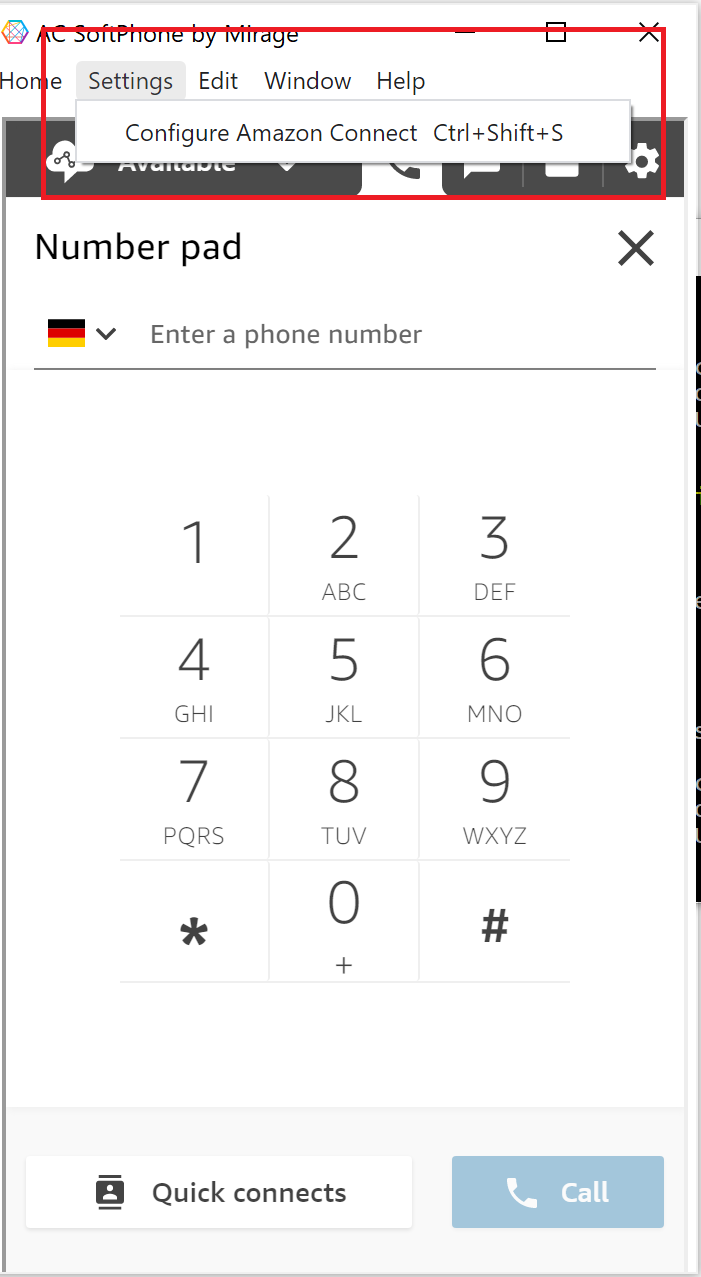
You can change configuration settings of your Amazon Connect SoftPhone by Mirage by selecting the Settings menu at the top and select Configure Amazon Connect.