
Licence Protector 5
To deliver a license file via download, the following steps are necessary:
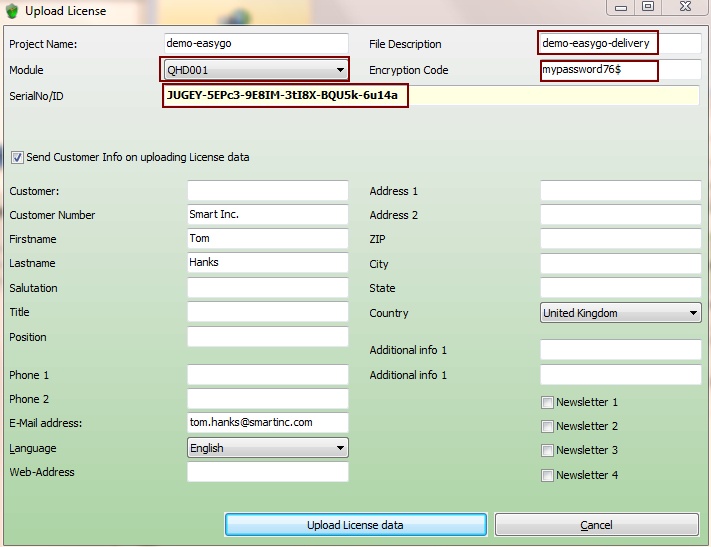
•Create a license file with the License Generator and upload this file to the Activation Server 6
•User gets a unique ID which he can use to download his license. This can be a customer number, invoice number or just a Serial Number
•User downloads his license using the unique ID
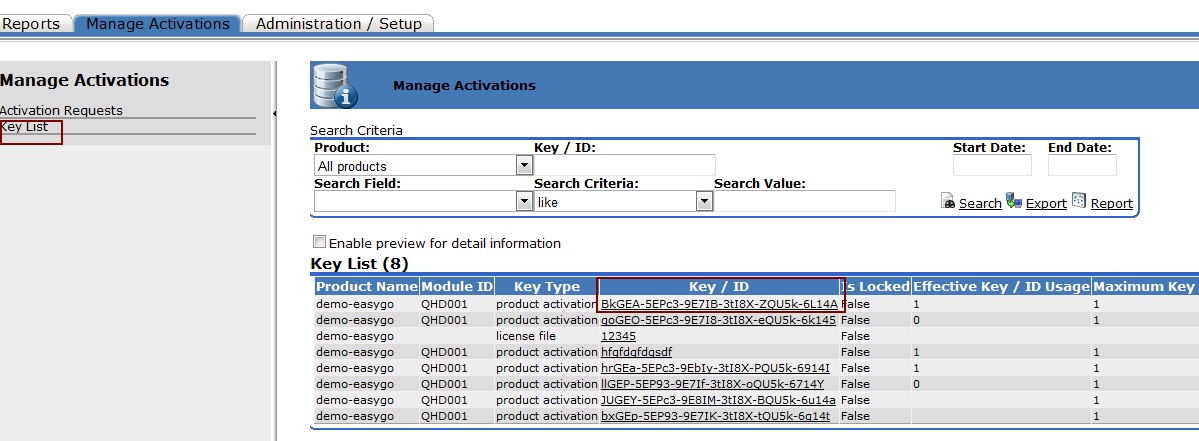
•When additional modules or licenses are bought, the license is manually updated on the Activation Server 6
•User downloads updated license information
Template demo-easygo-fileupload.xml template
You find a new template on the folder ..\Licence Protector\3.0\EasyGo.
Ensure that you have set the property - Activation Status after product activation - in your project file.
Use this template for all your tests.
Create a license file and upload it
Load your project and configure all the license options the customer ordered.
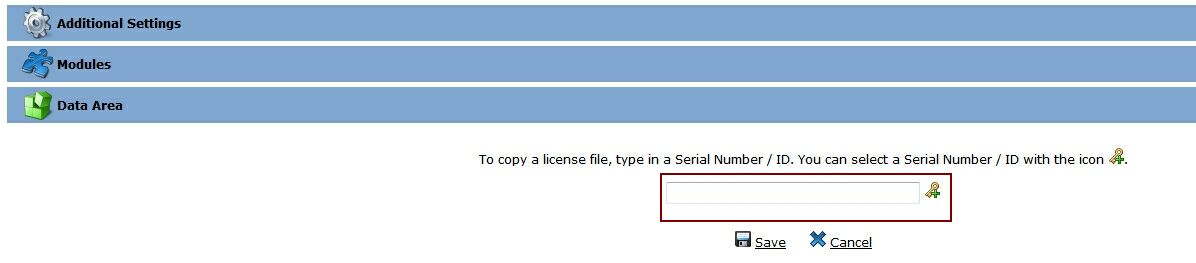
Create a default license file, upload it with the Generator and then always copy this default license file on the Activation Server 6. You can either create the license file with the License Generator or just copy an existing license file on the Activation Server 6.


User downloads the license and activates the product
The user can now download the license and activate the product, using the unique ID.
Provide a menu option: Activate license with a dialogue, where the user can type in his unique ID
•Open the license file on the local system with PrepareAdvanced
•To download the license file and activate the software use WebregisterExt. As ID use the unique ID / Serial Number the user typed in. As module ID use the module ID of your main module. Set the parameter RequestLicData to true to ensure, that the license file is downloaded. This command will always connect to the Activation Server 6, download the license file (if specified) and activate the product.
For activation, the workflow rule defined on the Activation Server 6 is used - see Project.config file
•Use SendCustomerInfo to send customer address information. The parameter ID / Serial Number must contain the Serial Number to link it with the customer address data
•To save the unique ID / Serial Number in the license file use SetVal (''module ID", 'SNR', your ID / Serial Number)
•Save the customer name in the license file using SetVal (''", 'CST', customer name)
•Now make a backup of the license file. Use UploadLic to make a backup of the activated license file
Regular application start
When your application starts, always use the following code sequence to make the basic license check:
•SetLanguage - define language for all screens and error messages. Necessary even if you use own screens
•Open the license file with PrepareAdvanced - implement an own error handling. Error 1024 (copy protection violation) should allow to type in an Activation Key to switch copy protection type. Use SecurityLevel and PrepareForce to open the file and ShowLicViewer or an own user interface to provide the necessary information
•Test if the license was deactivated or a regular online check is necessary using CheckModuleSubscription. This would only initiate an online check in case the license was locked, transferred or if a regular online check is due
•Now test the main module with ValidateEX or ValidatesYes and check for time limitation with RemainingDays an/or ExpiredOn
•Use GetWebActivation to find out if the module is activated or not
•If the module is expired display a screen - Evaluation Period Expired
•Provide an Own License Viewer to allow the user to view his license information,
•To display errors, you could use ShowStartErrorPage, which would also cover to view the license and apply keys. You can retrieve a language specific error message with GetErrorMessage for your own dialogs
•Use Quit at the end of the application
Modify the license file - add or change licenses
If the user buys additional modules or more network licenses, you change the license information on the Activation Server 6.
User updates license information
Provide a menu option: Update my license
Use the following code sequence:
•PrepareAdvanced to open the license file
•Read the unique ID / Serial Number using GetSerial
•Now update the license information using CheckModuleSubscription. Set ForceOnlineCheck to true (will connect to the Activation Server 6) and also set the parameter RequestLicData to true to ensure, that the license file is downloaded
This will download the latest license file information from the Activation Server 6
Transfer a license
You can transfer a complete license file to another PC.
Provide a menu option: Transfer my license
Use the following code sequence:
•PrepareAdvanced to open the license file
•Read the unique ID / Serial Number using GetSerial
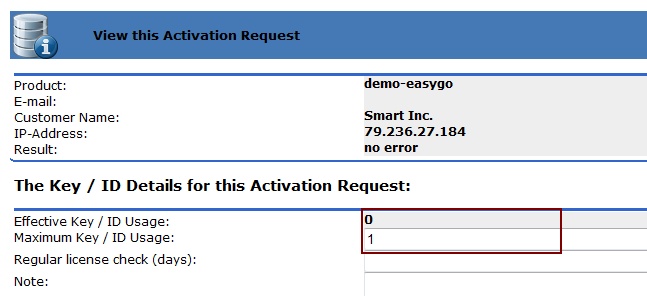
•Use DeactivateModule and the main module ID to deactivate the license on the Activation Server 6. Set the parameter SendLicData to true to ensure, that the latest license file is uploaded to the activation server. The field Effective Key / ID usage is now set to 0 so that the unique ID can be used on another PC
•If the user would restart the application on this PC, the command CheckModuleSubscription would make an online check and reassign the license to this PC again
Use license on another PC
The user can now install the product on another PC and activate the license again. See User downloads the license and activates the product
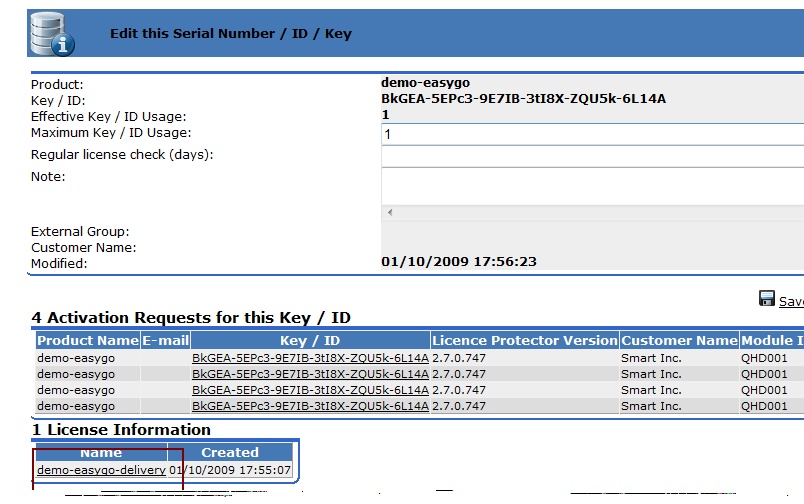
Using multiple license files for one ID
The concept supports saving multiple license files for the same unique ID. This allows you to save backups. A good idea is to use always the same names.
Example
•The original file name of the delivery - store it with the project name and extension: delivery - e.g. demo-easygo-delivery
•A backup file - store it with the project name and extension: backup - e.g. demo-easygo-backup
Configuration settings on the Activation Server 6
The following values in the project.config file on the Activation Server 6 are important for the license file upload:
The project.config file needs the configuration setting, that only uploaded Keys / IDs are accepted. This ensures, that the user cannot use a fake ID to download the file.
•EntryRequired=true
You can configure this option using Administration / Setup, Product configuration
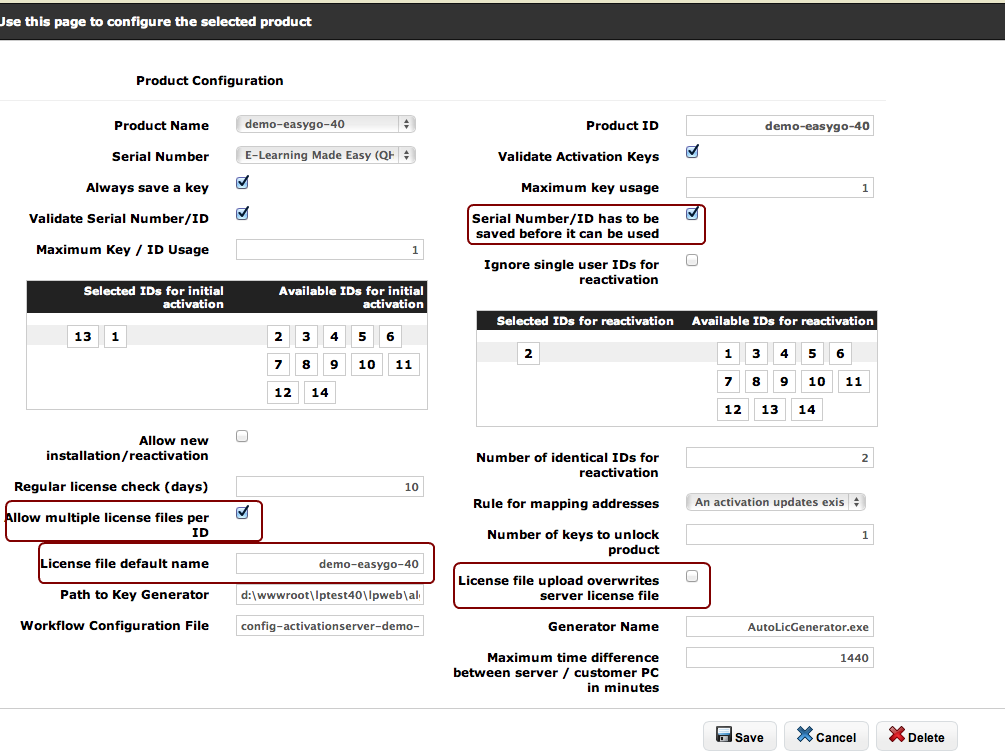
There are additional options for for the license file
•Allow multiple license files per ID - MultipleLVS
•License file default name - LvsDefaultName
•License file upload overwrites server license file - LvsOverwriteServerChanges
