Unaric Voice
For Pre-Recorded Voicemail setup, the following steps are required in Amazon Connect
1. Create Pre-Recorded Voicemail Prompt - To upload the Pre-Recorded Voicemail to Amazon Connect .
•Prompts are audio files played in call flows. For example, hold music is a prompt. Amazon Connect comes with a set of prompts that you can add to your contact flows. Additionally you can add your own recordings.
•You can upload a pre-recorded .wav file to use for your prompt, or record one in the web application.
To create a prompt
•In the navigation pane, choose Routing, Prompts.

•On the Manage voice prompts page, choose Create new prompt.
•Choose the following actions:
•Upload—Select the file to upload.

•Record—Select the red circle to begin recording. Use the red square to stop. You can choose Crop to cut the recorded prompt or Discard to record a new prompt.

•For Step 2: Input basic information, enter the name of the file, and then choose Create.

•Amazon Connect supports prompts that are less than 50 MB and less than 5 minutes long.
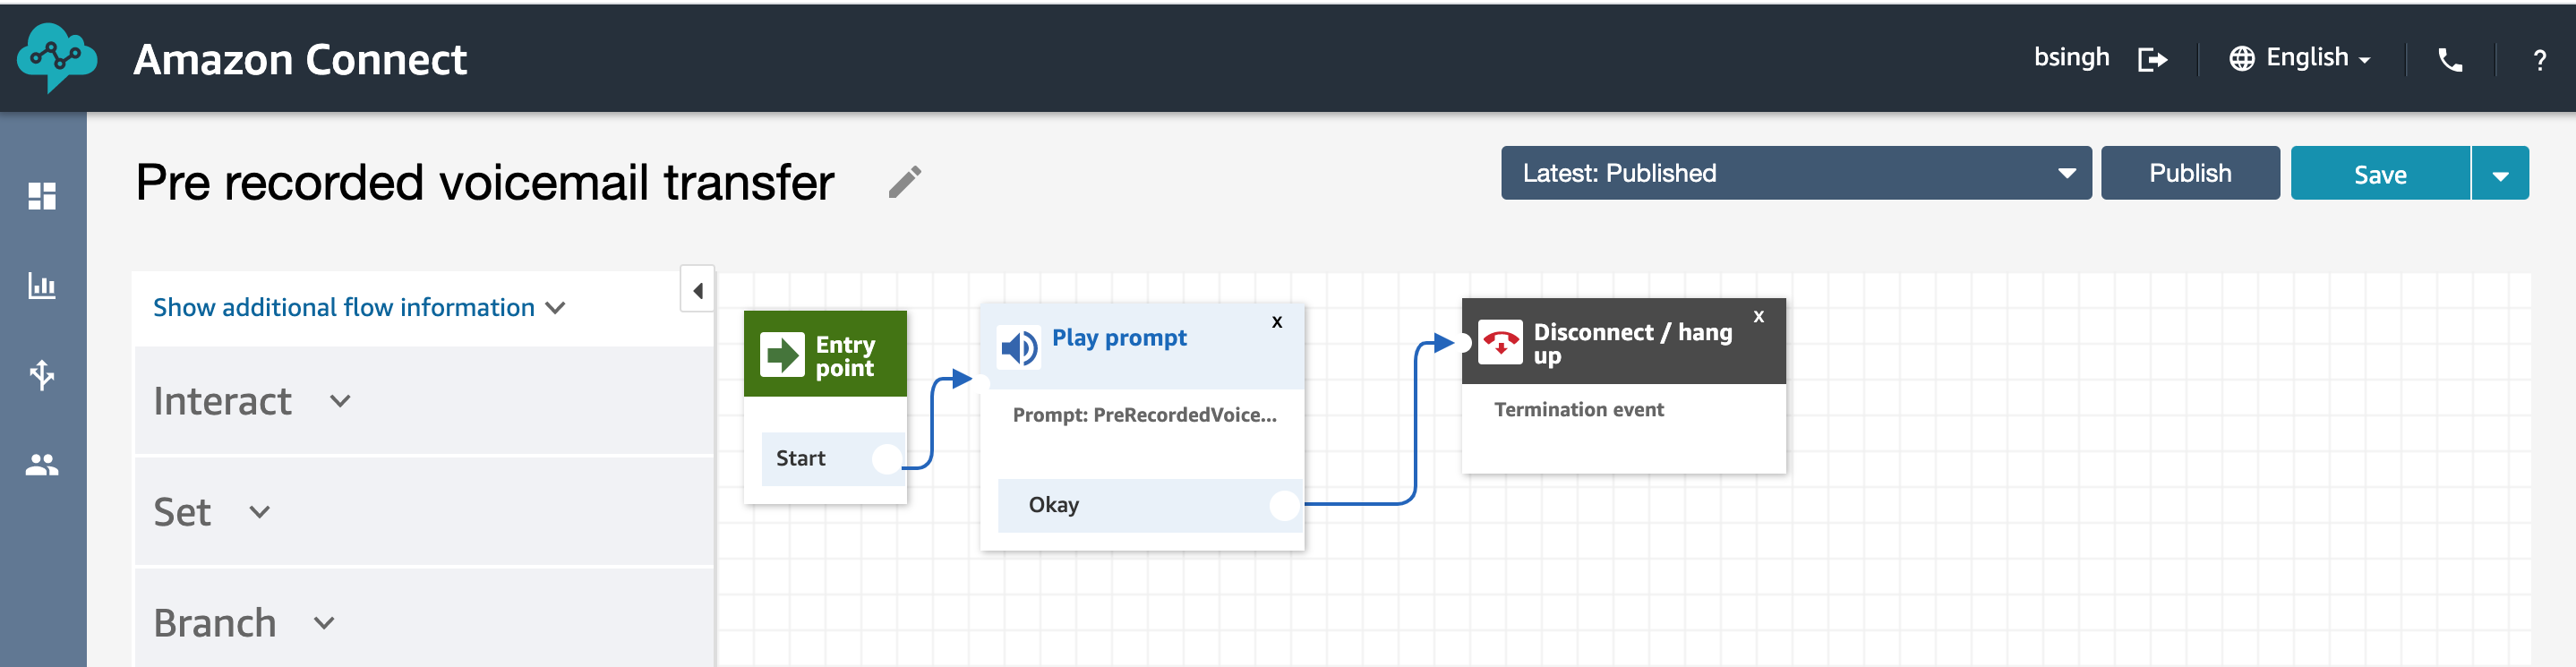
2. Create Transfer Agent Flow for the Pre-Recorded Voicemail - This transfer flow will be assigned to the Pre-Recorded Voicemail agent and will contain the voice mail to be played.
![]()
Use a Play Prompt control and assign the recorded message to the prompt control. Save and Publish the flow.

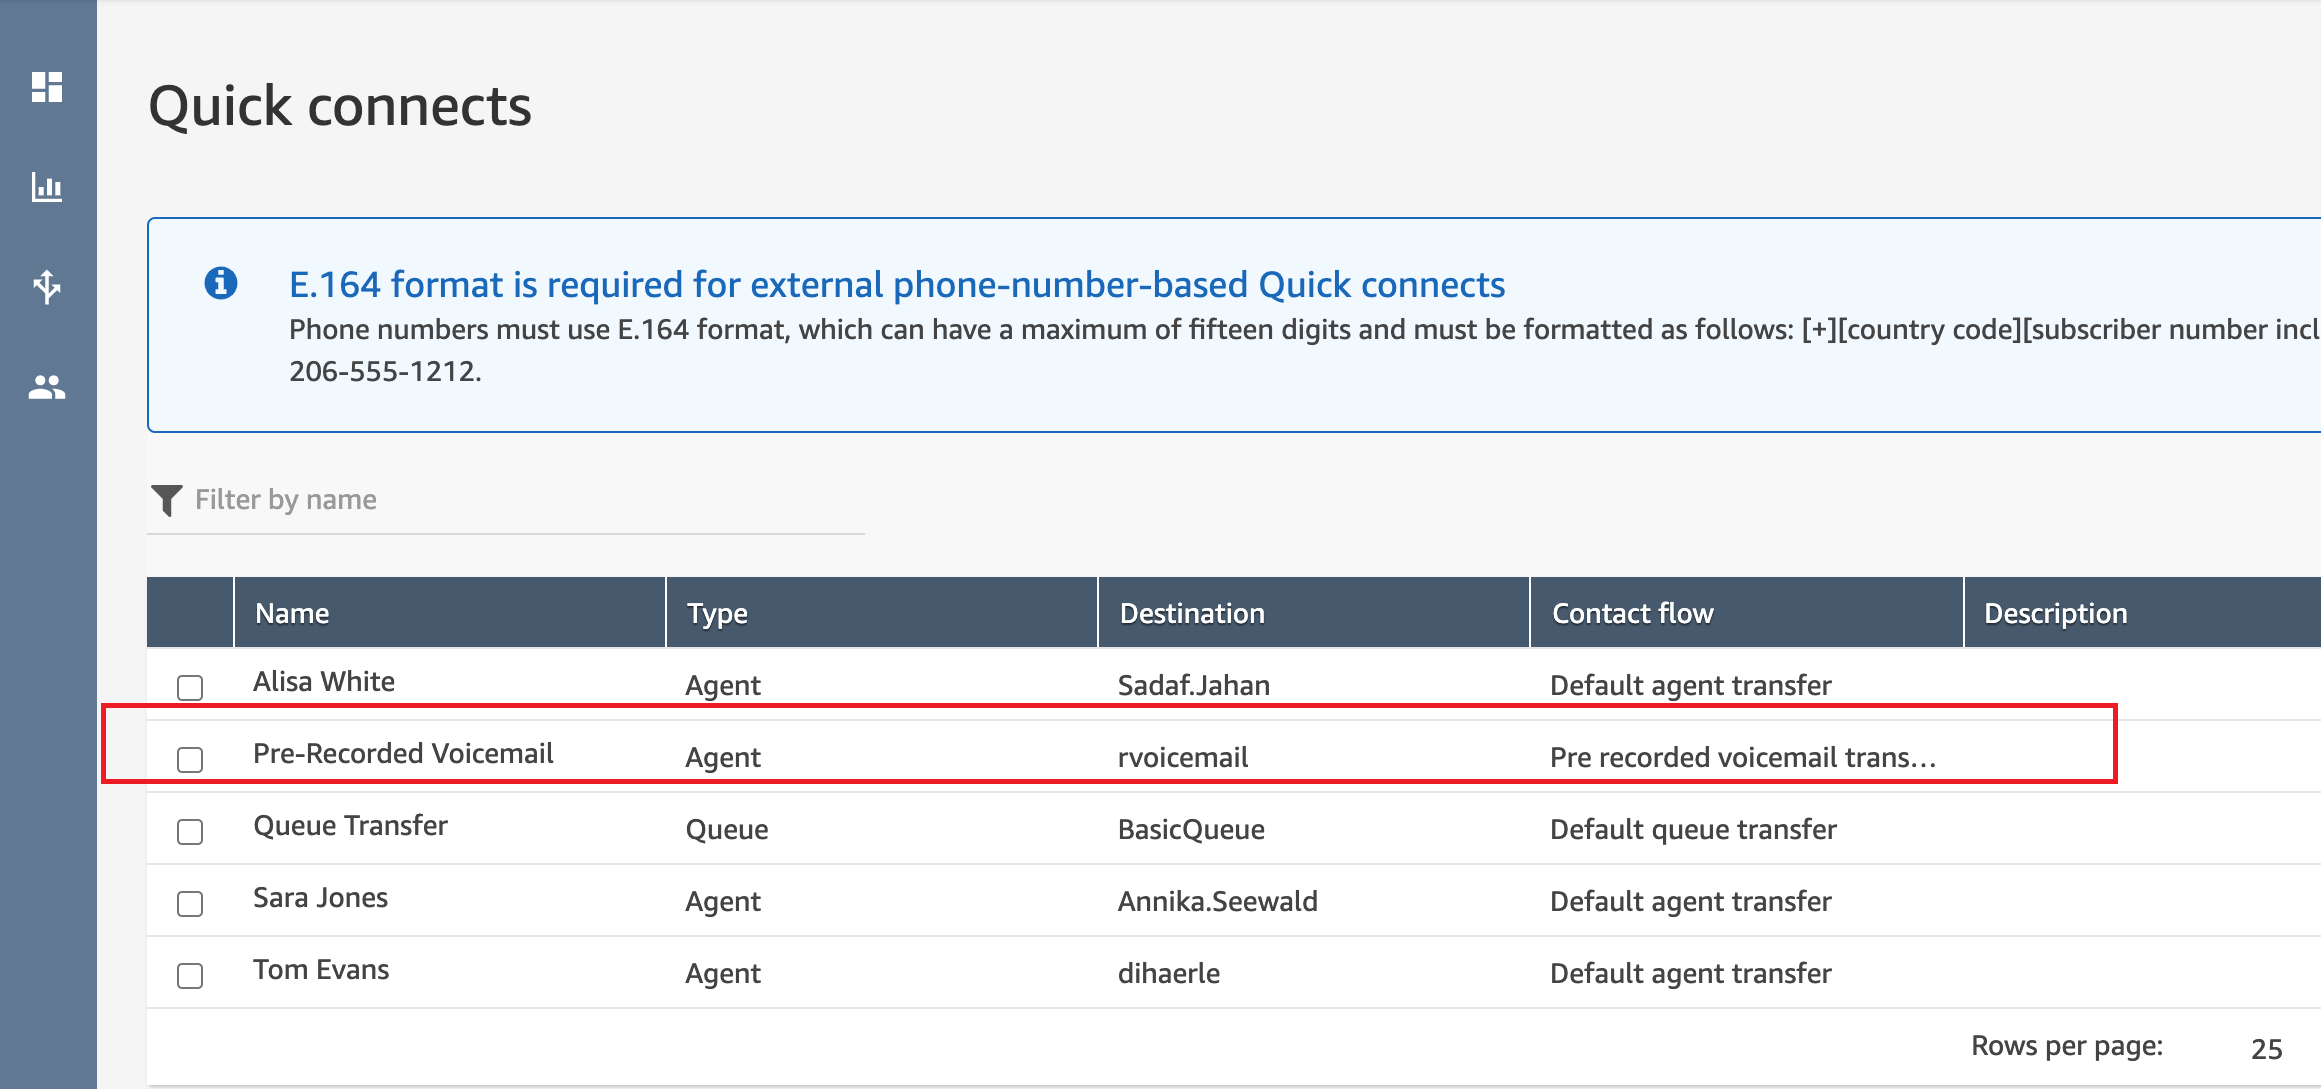
3. Create Pre-Recorded Voicemail Quick Connect - Quick connect agent where the call will be transferred when we need to play the recorded message to the customer.
•Create a quick connect with a meaningful name which clearly state that the quick connect is for Pre-Recorded Voicemail.
•Assign the Pre-Recorded Voicemail flow to the quick connect agent for the Pre-Recorded Voicemail .
•Assign the Quick Connect to a queue.