
Unaric Voice
The Live Agent Dashboard setup is done in four steps
Enable the Dashboard
To enable the Dashboard functionality, open the Presence State configuration in the Call Center.
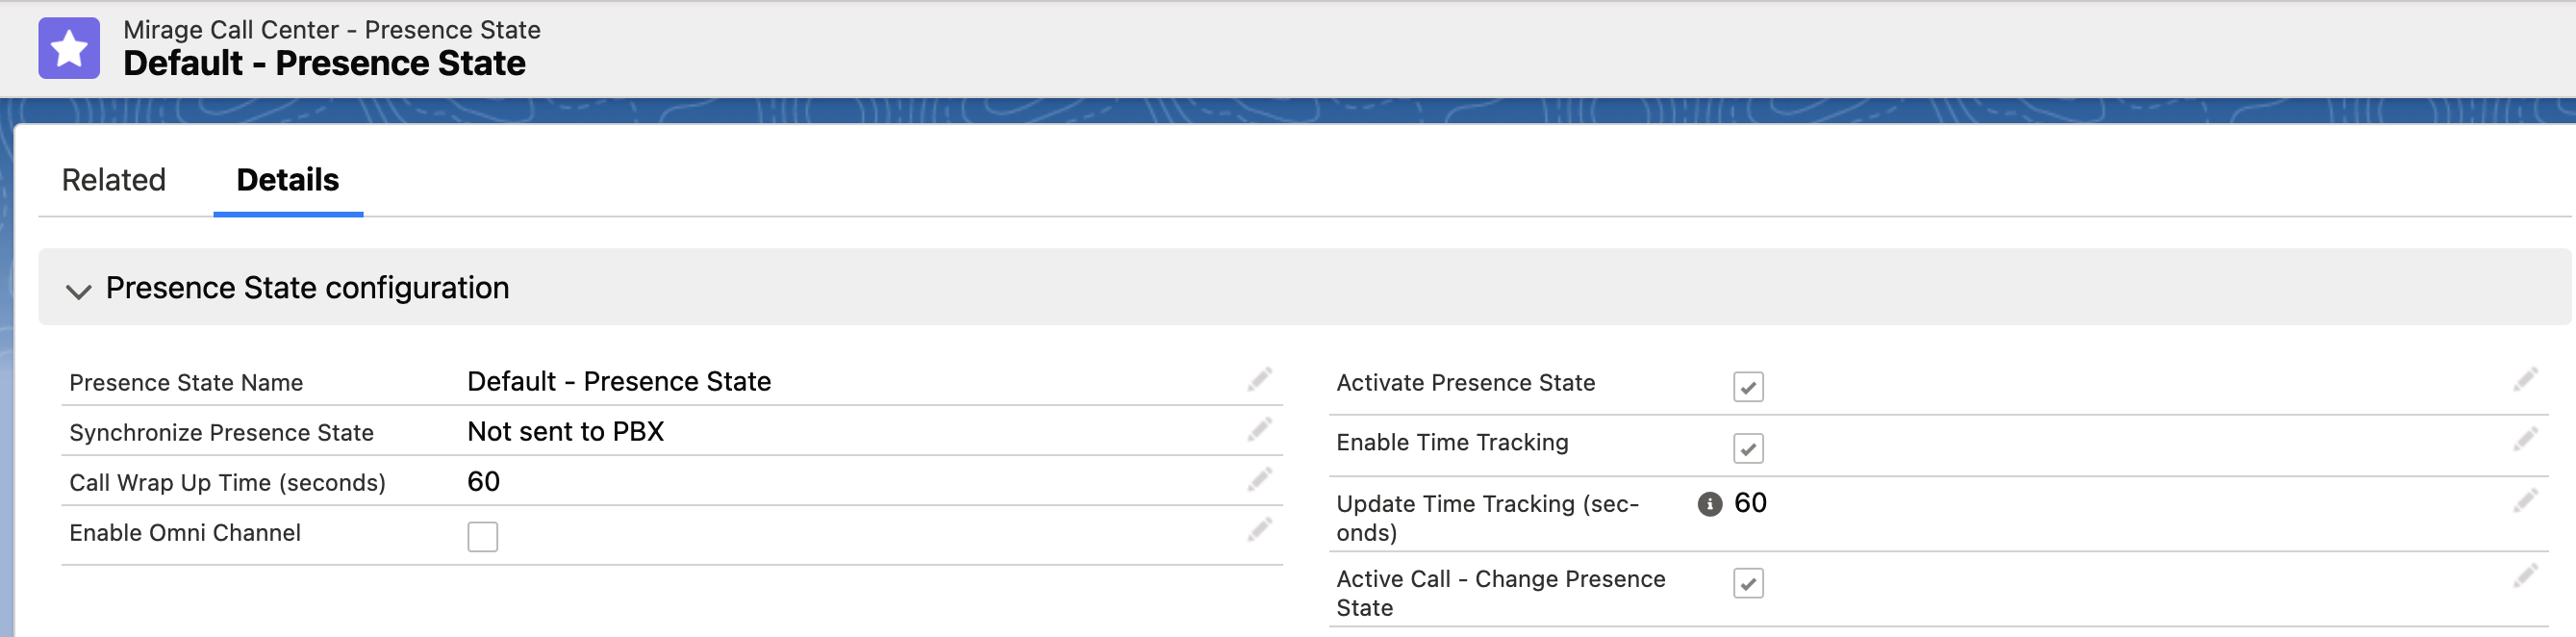
The required settings for the Dashboard are
•Activate Presence State
•Active Call - Change Presence State (for some phone systems like Amazon Connector or MS Teams it is not possible or done automatically)
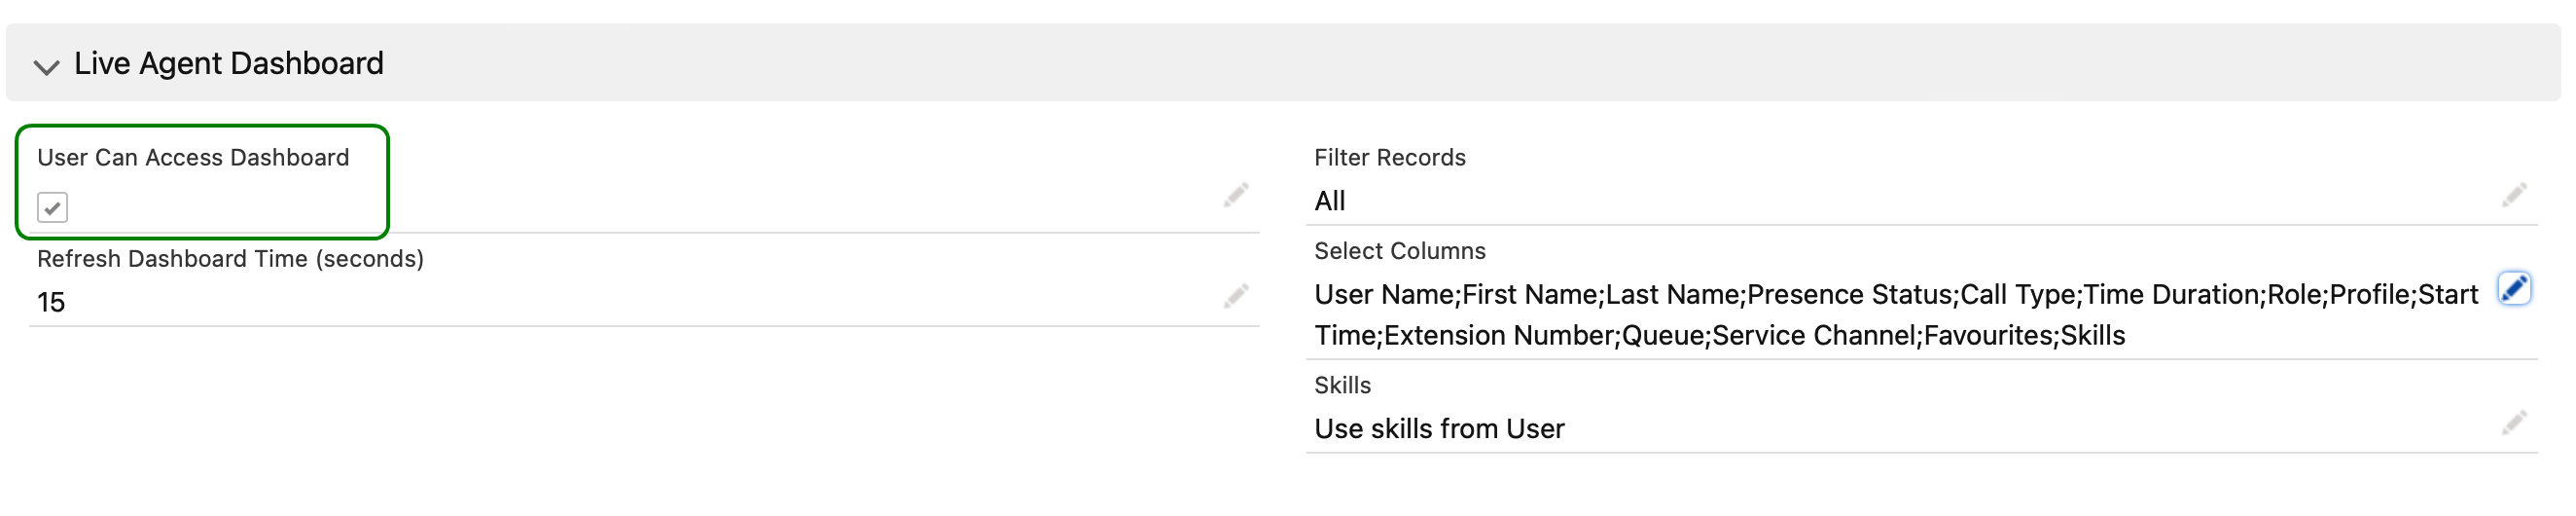
•User can access Presence State Dashboard
•Define Skills (optional)
Information to be displayed (Columns)
Most of the column text is self-explanatory. It is recommended to add:
•Profile Picture
•User Name
•Presence State
•Call Info or Call Type (see below)
•Time Duration (Minutes / seconds since the user is in the presence state)
•Start Time (date / time since the user is in the presence state)
•Role
•Extension Number
•Queues over which the active call takes place (only if the phone system supports it)
•Queues the user is logged in (only if the phone system supports it)
•Call Campaign (only if the Power Dialer is used)
•Skills (only if needed)
•Local time, City, Country - for international teams
•Favourites
Call Type oder Call Info?
•Call Type will only display: Outgoing or Inbound
•Call Info will display Outgoing or Inbound and additionally the Account, Lead or Contact who is in the call
Only one option can be selected.

Display order
You can move a column up and down to select the position where a column should be displayed.

Reporting
If you need a Presence State report about how many minutes a user was in a special presence state like In a Call or At Lunch, you need to configure additionally
•Enable Time Tracking
•Update Time Tracking (seconds)
Configure Presence State
Define the presence states you want to display in the Dashboard, or you wish to have in reports. If your phone system does not support changing a presence state, the Dashboard will still work, but in your phone system, the presence state would be different or would not change.
Add the desired labels and configure the phone synchronization.
Add the Live Agent Dashboard to the page layout
The second last step is to add the Dashboard to the page layout.
Switch to the Lighting setup, Apps, App manager. Select an app from app type: Lighting and click on Edit.
Add the Navigation Item: Live Agent Status Dashboard to Selected Items
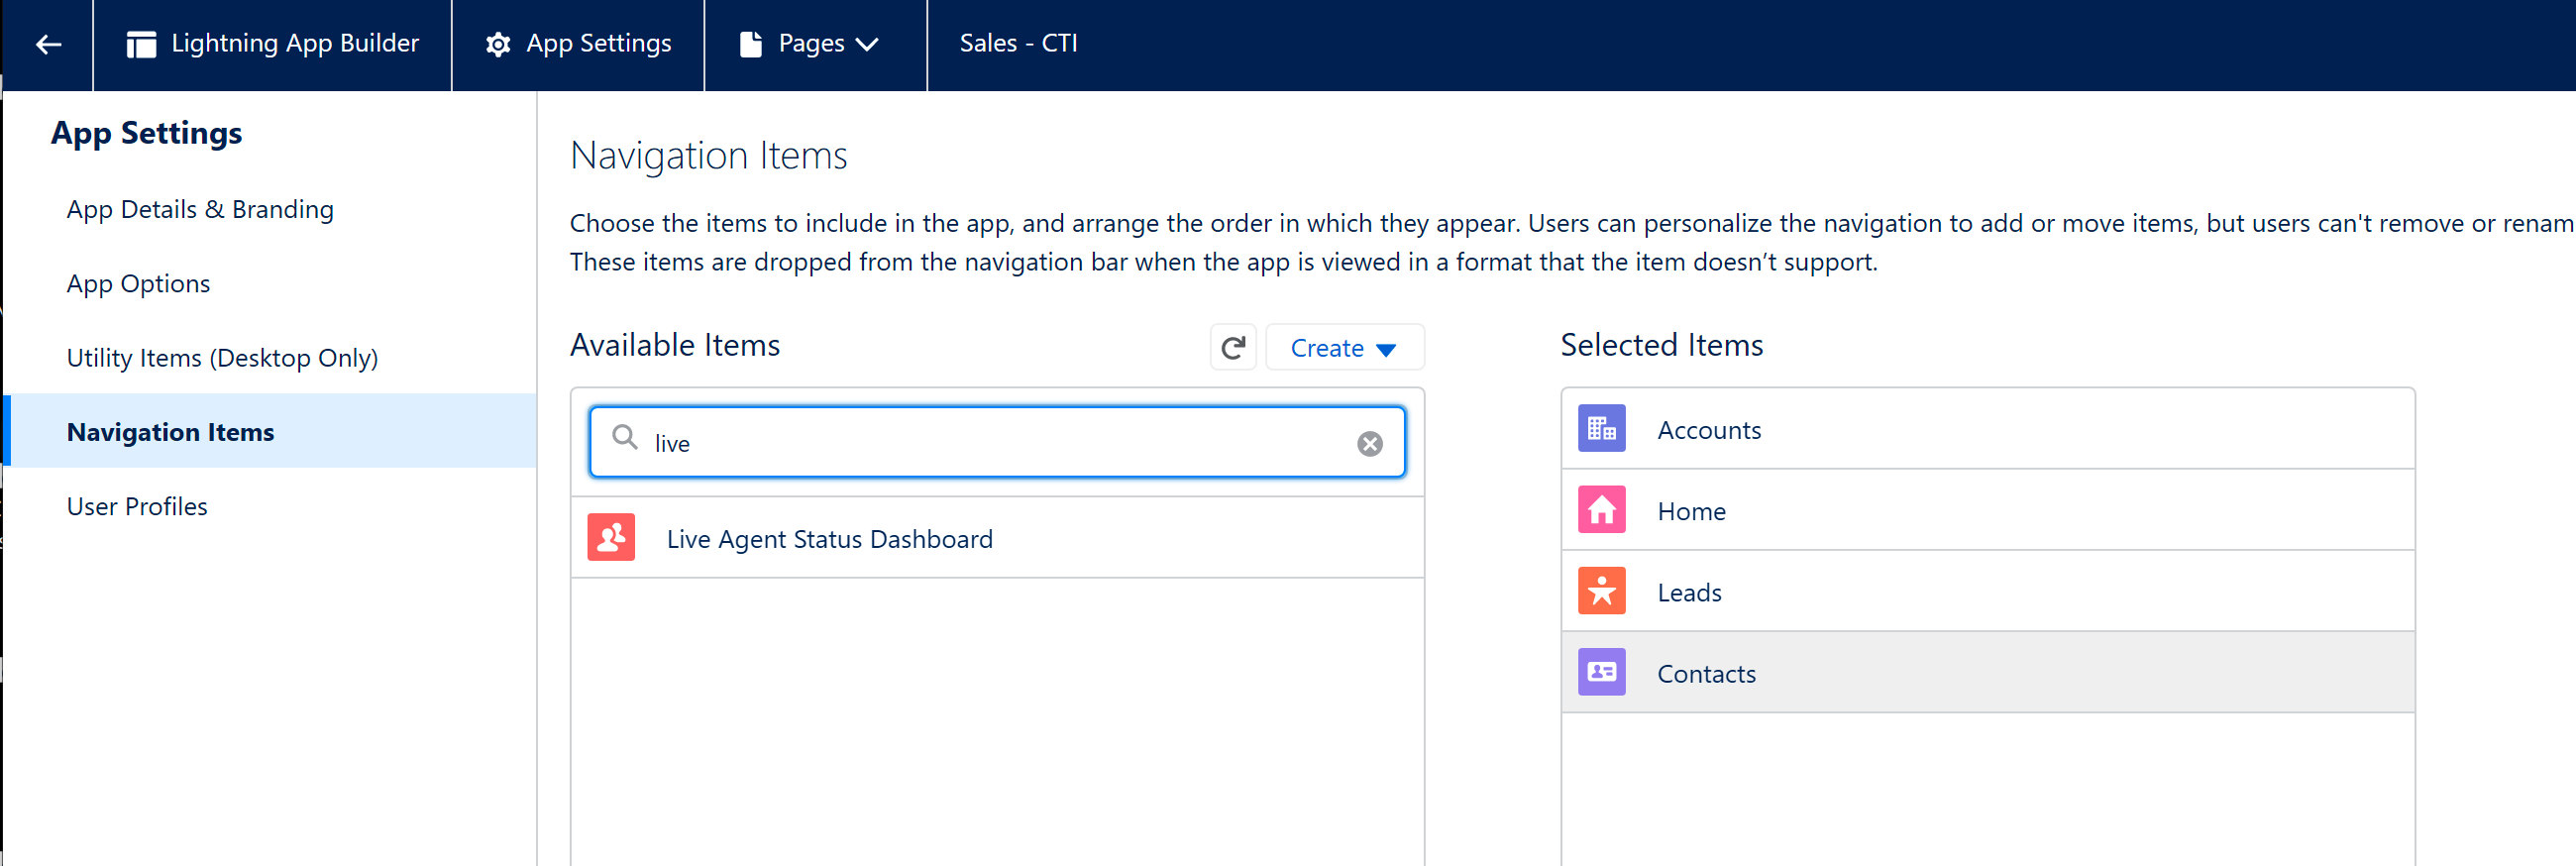
It should then appear as an additional item

Activate Logout detection
To find out if a user has logged out from Salesforce and then change the presence state to Logout, a monitoring is required.
This configured in the Main Call Center Configuration.
